Viewing entries tagged
snacks

Morroccan Spiced Linzer Jam Cookies

Comment

Morroccan Spiced Linzer Jam Cookies

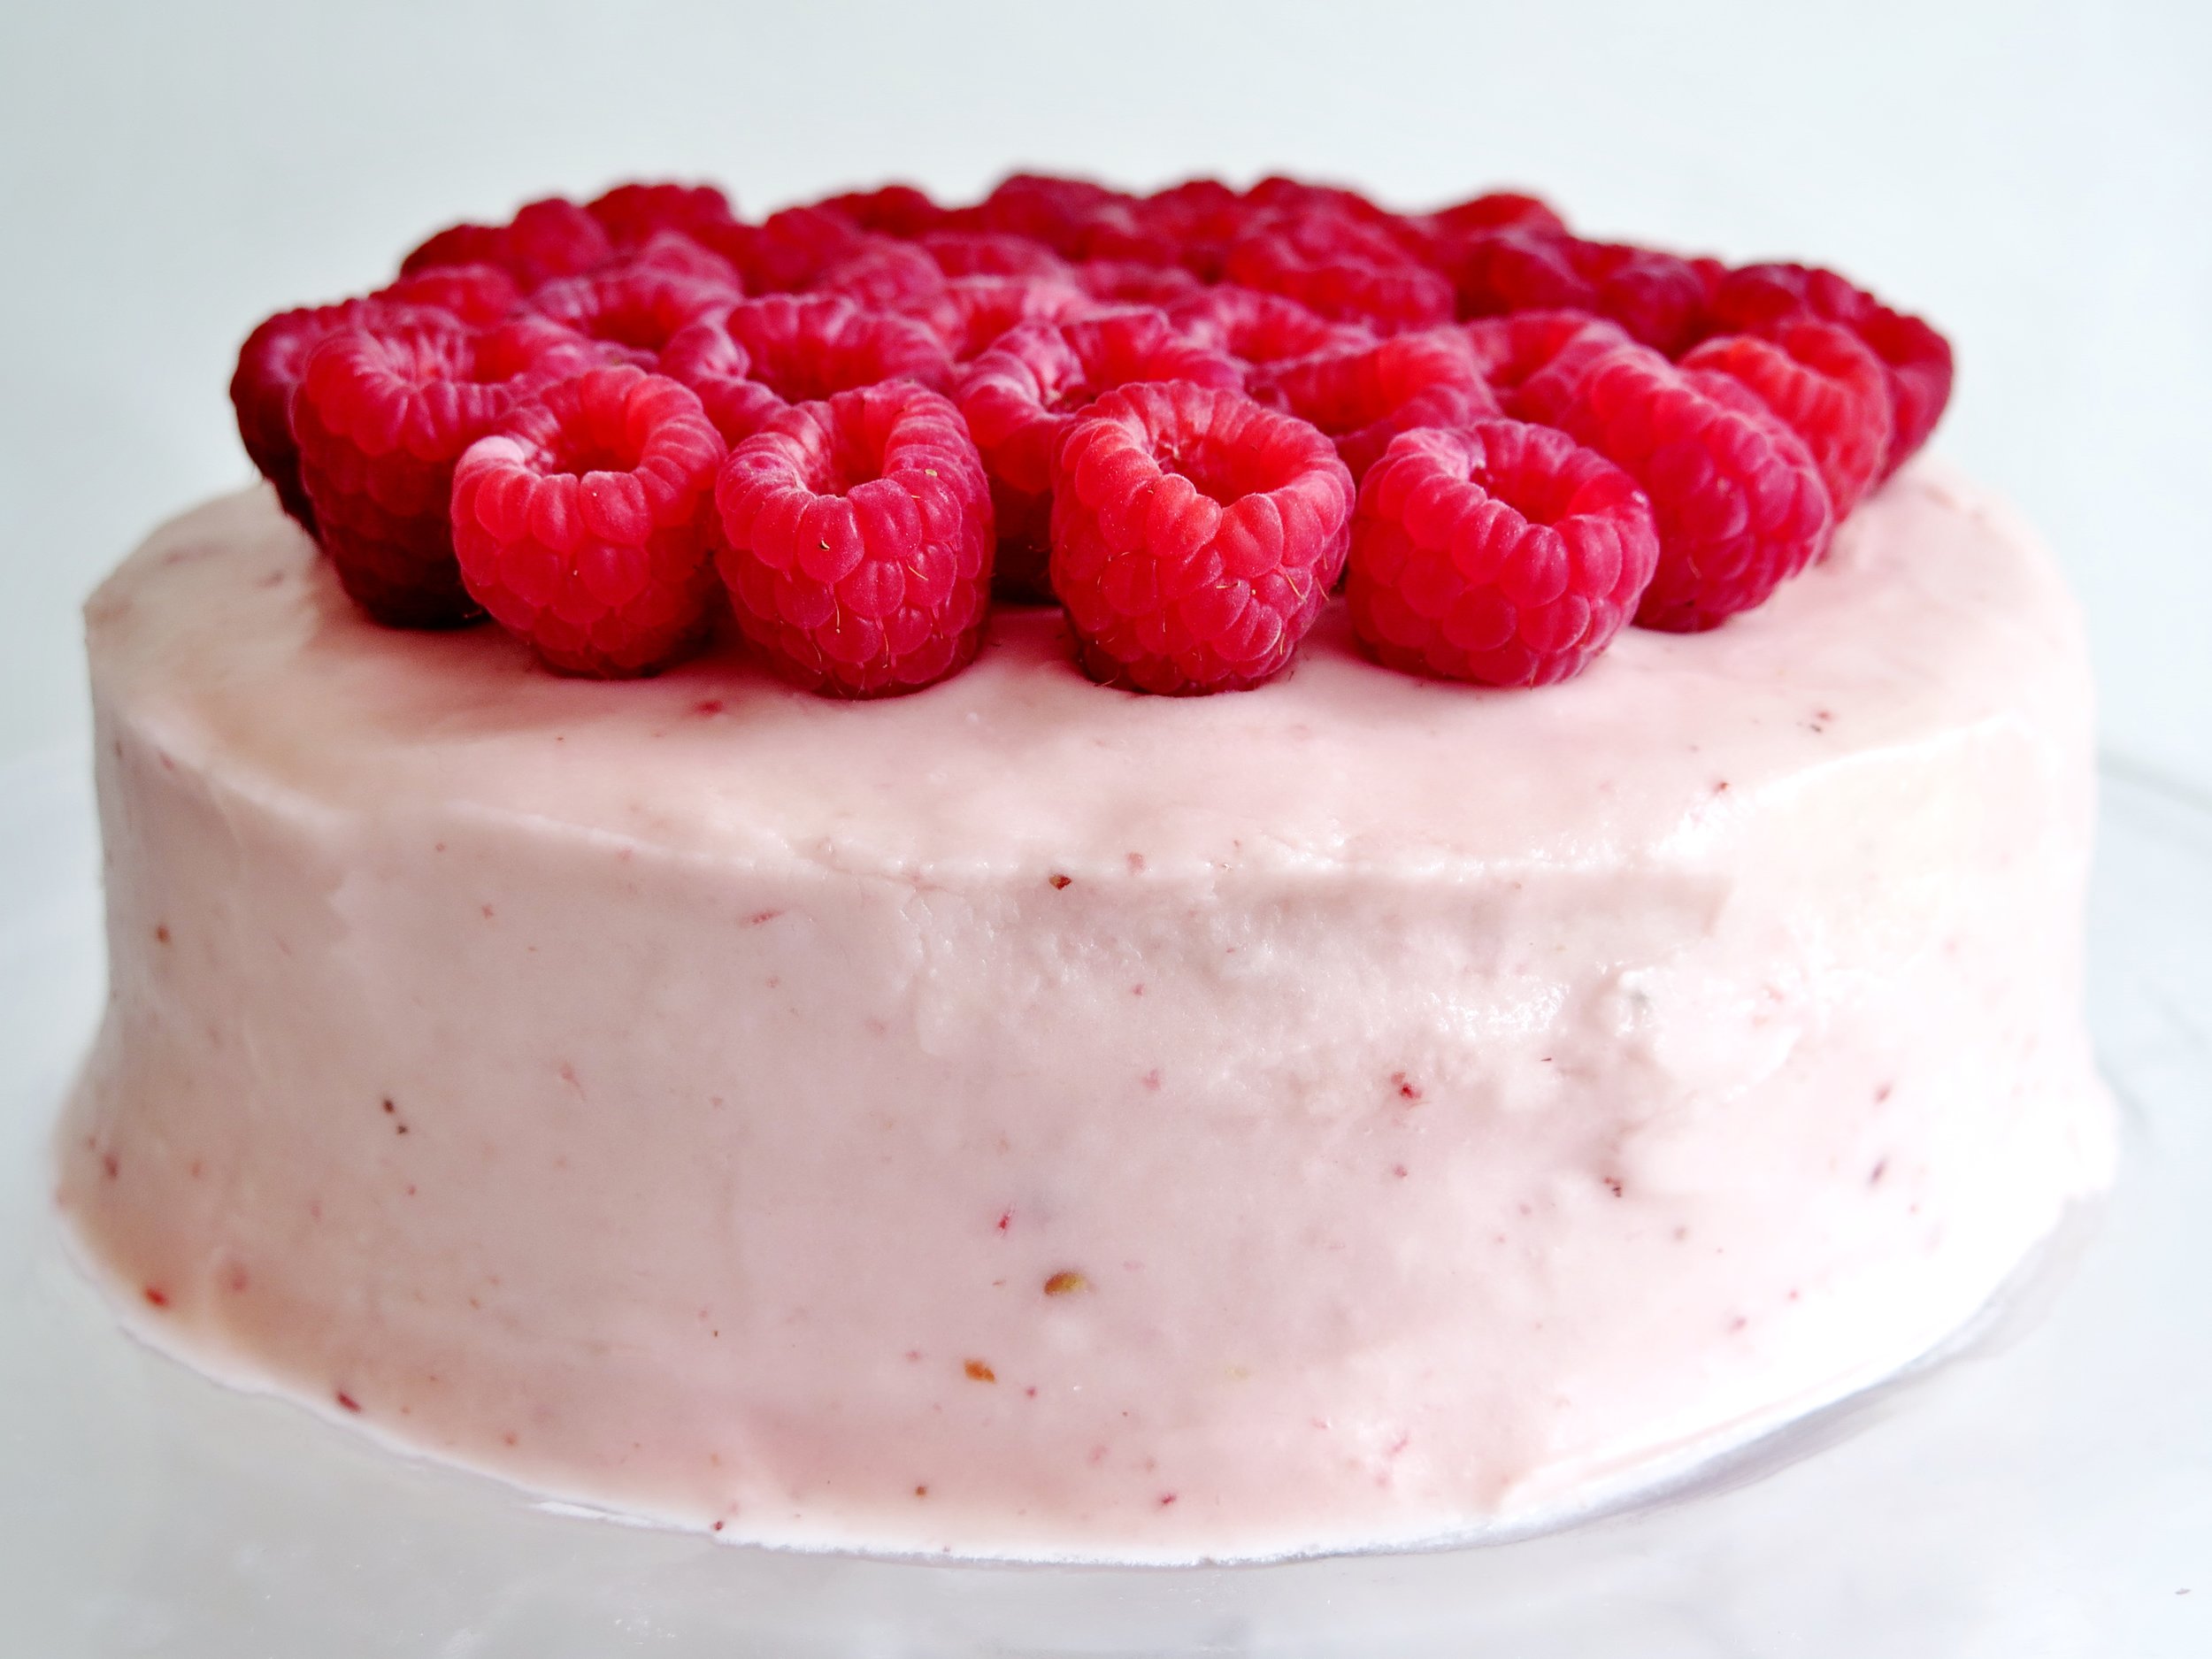
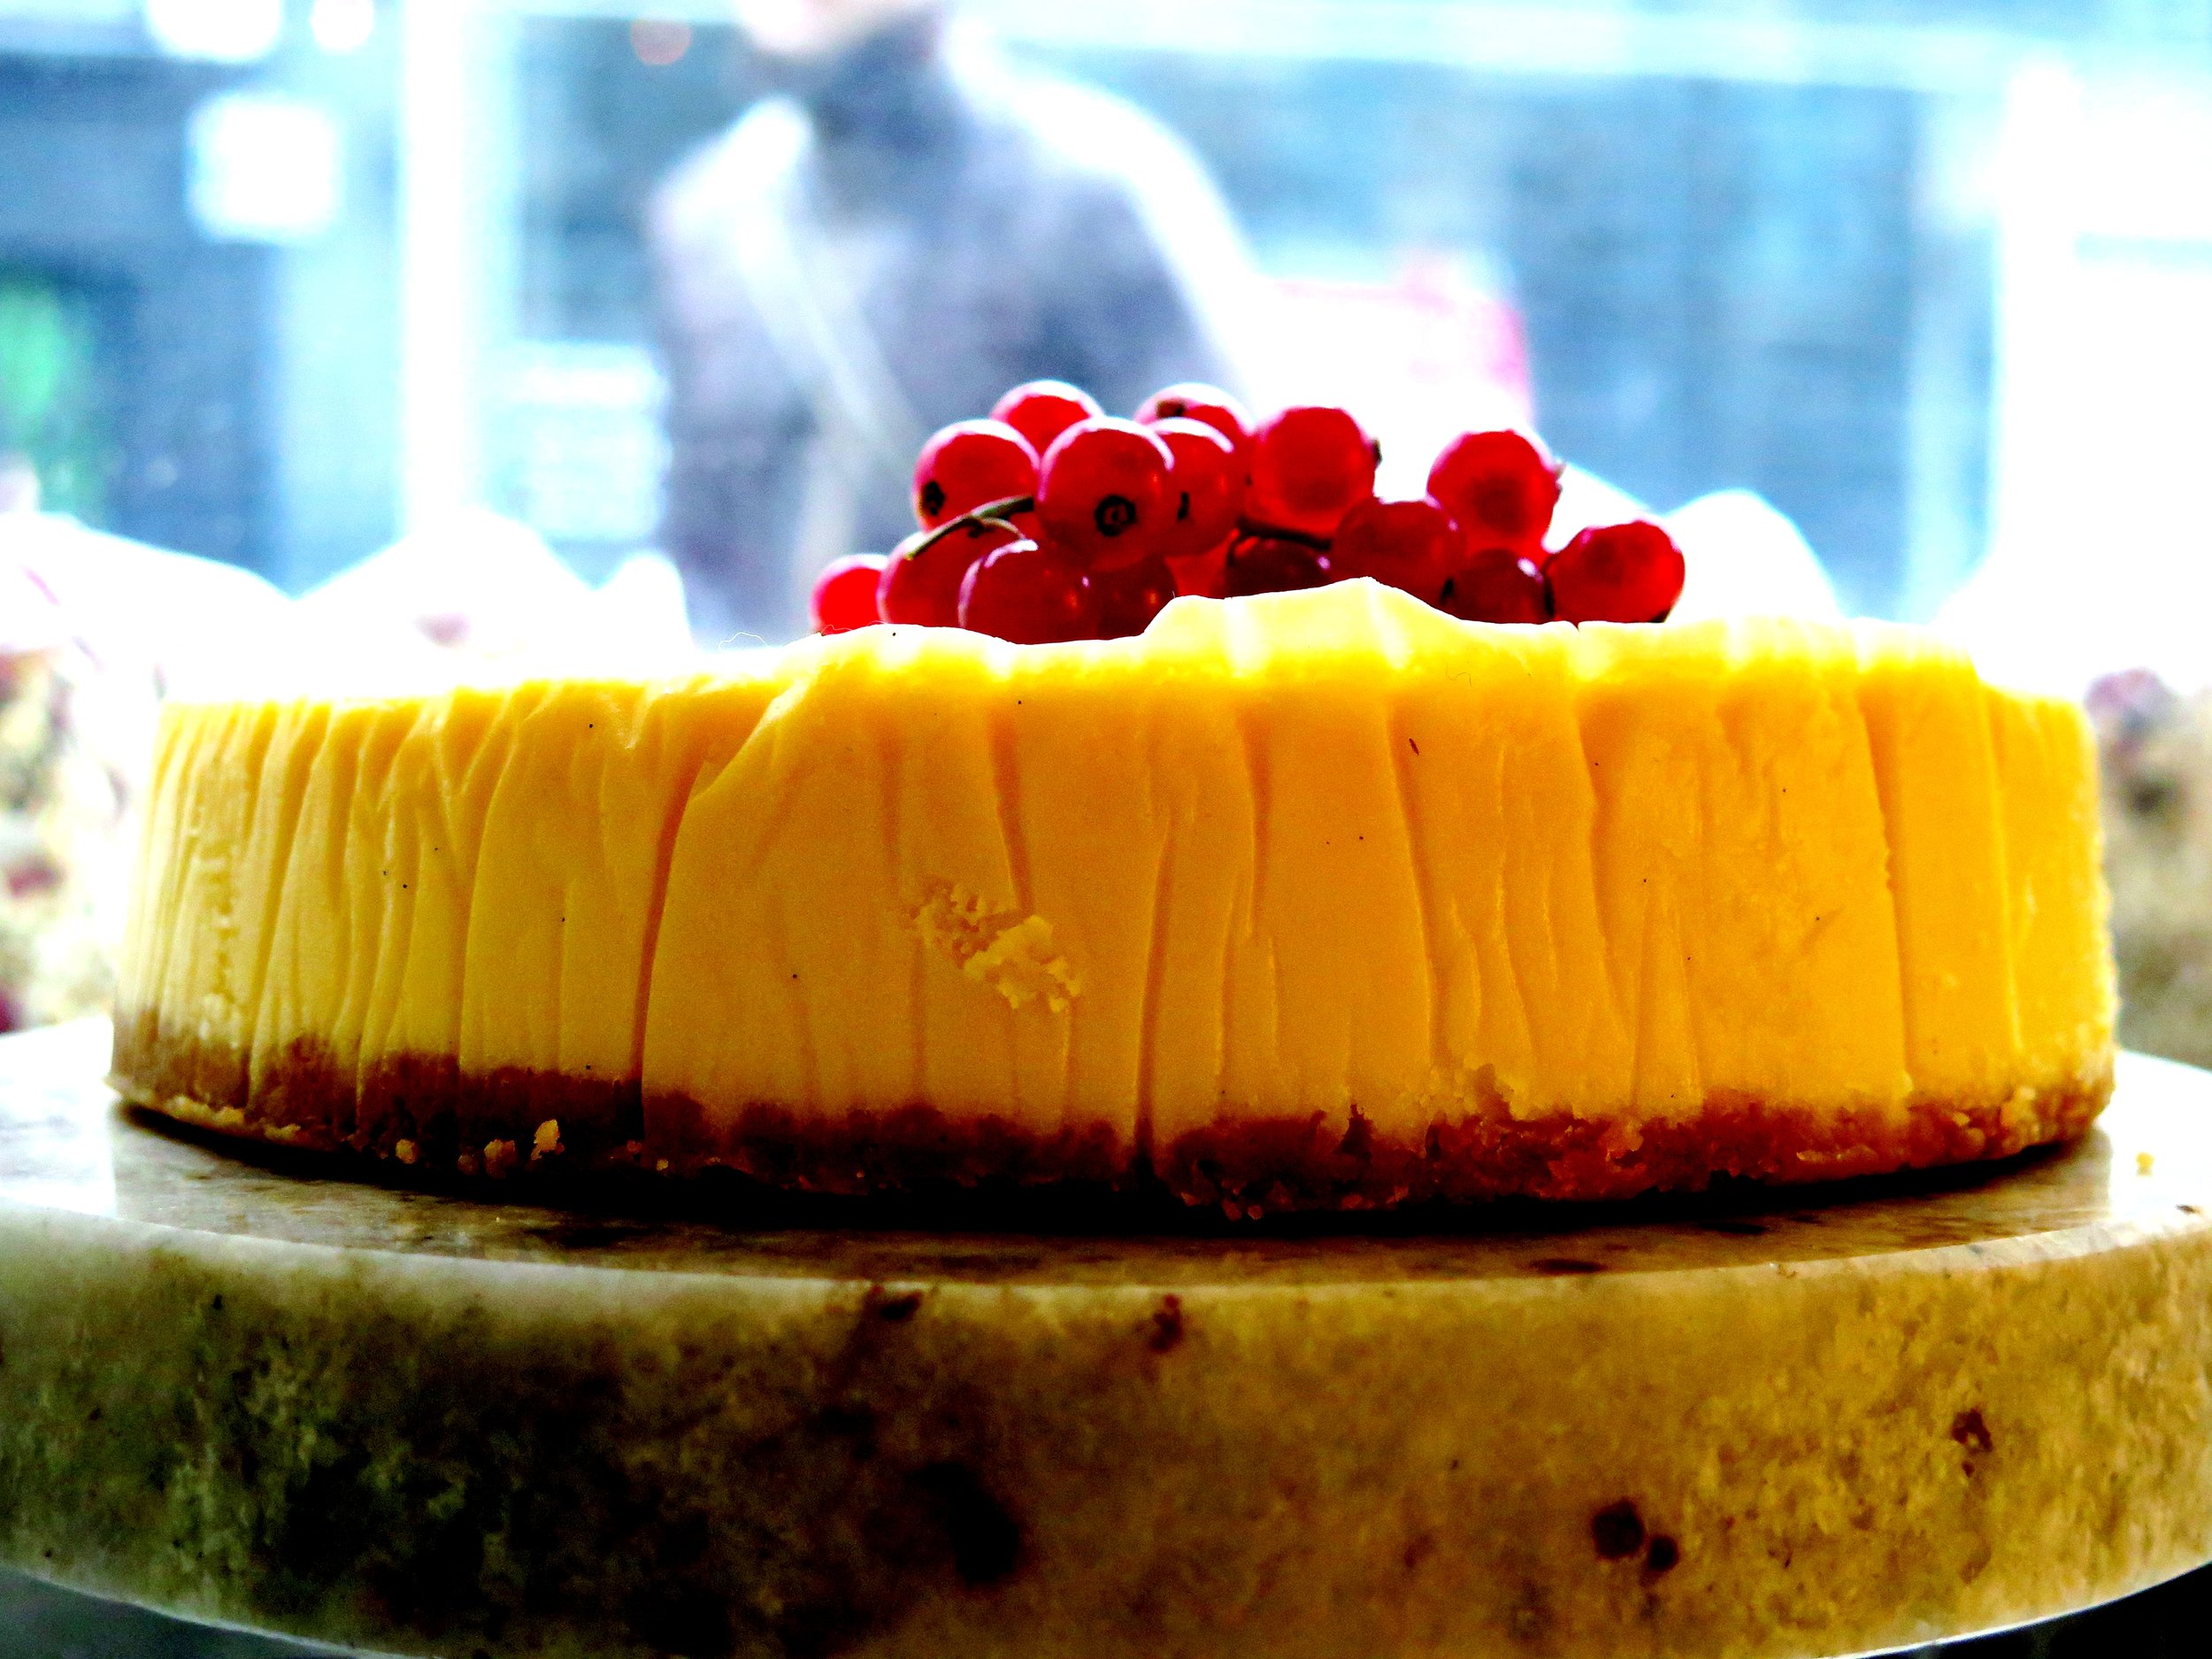
Afternoon tea.  What do you think of when someone says those words? Tiers of fluffy isosceles sandwiches, miniature entremets layered with fruit, caramel, and chocolate, and maybe a scone glistening with strawberries.  Crisp napkins, high ceilings, the tinkling of fine bone china…

Near where I live there is an Austrian tea room.  The window is filled with garish glace cherry- adorned, deflated pastries, crusted squiggles of festering cream, and opera cake melding into a brown sludge. It opened 60 years ago, and the décor and pastries appear not to have been refreshed since.

Morroccan Spiced Linzer Jam Cookies

Inside, it is dark and cramped, and the airless atmosphere is thickened with hot breath and the oversweet smell of fat and sugar.

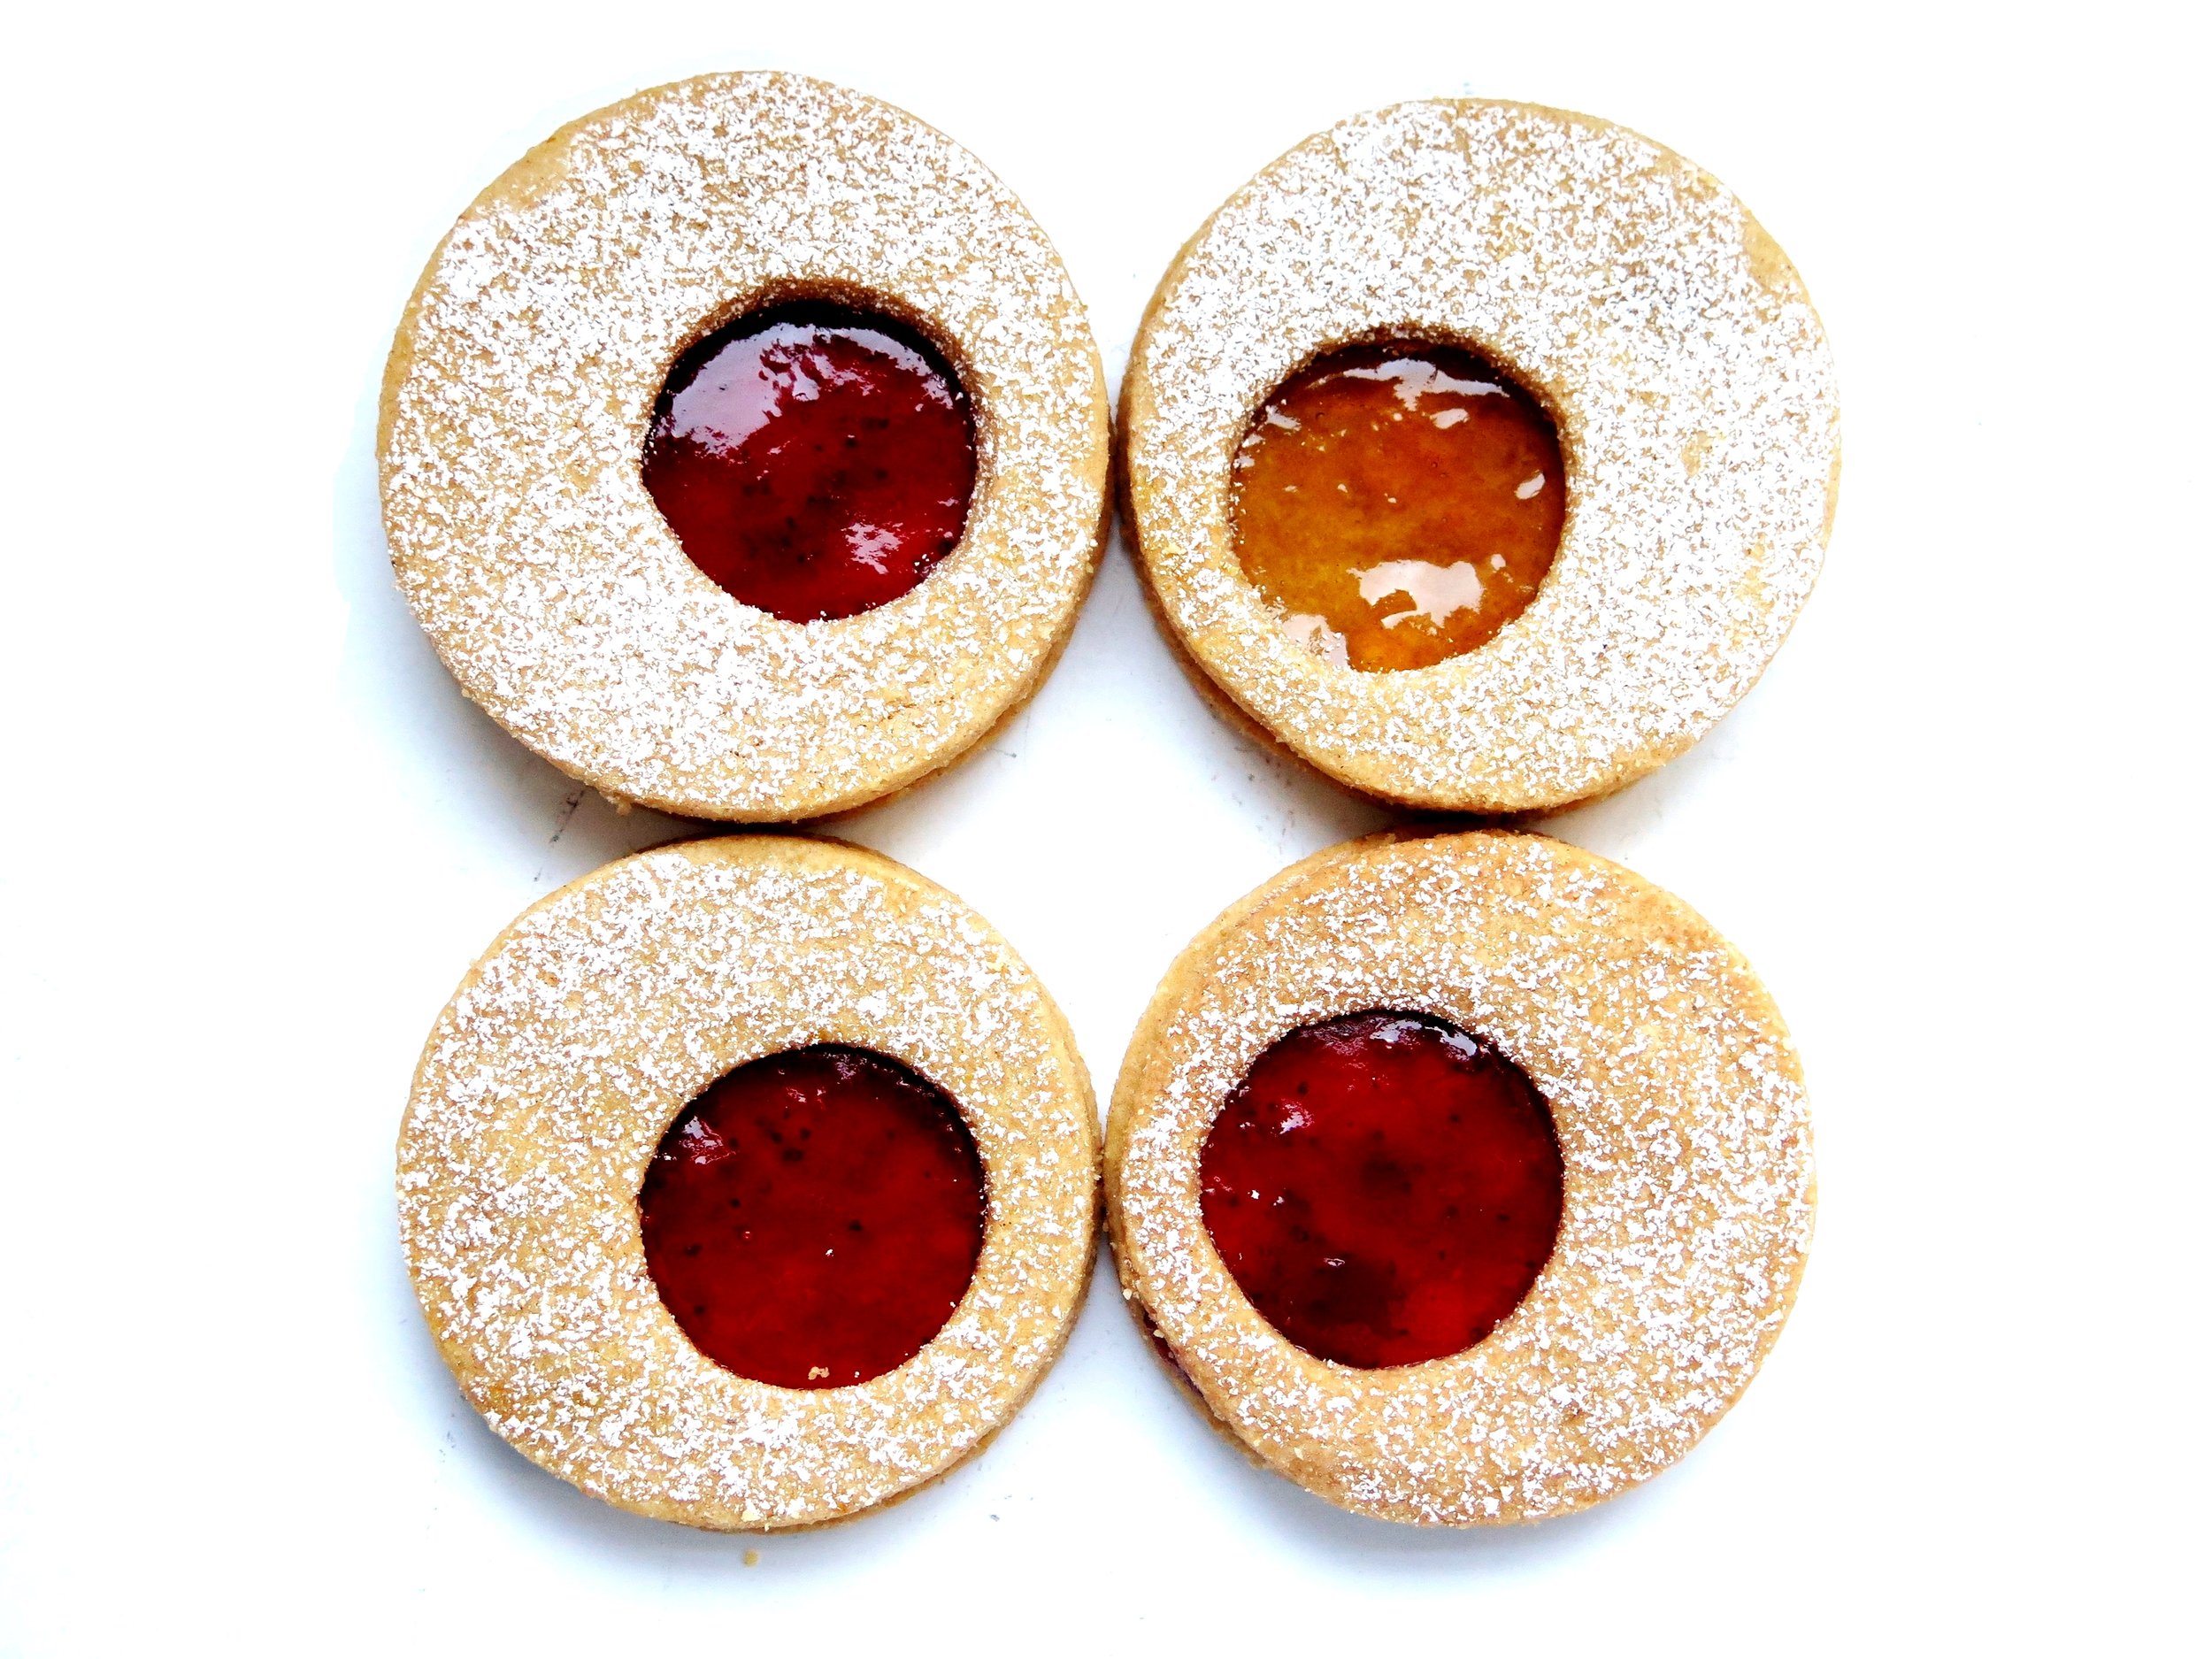
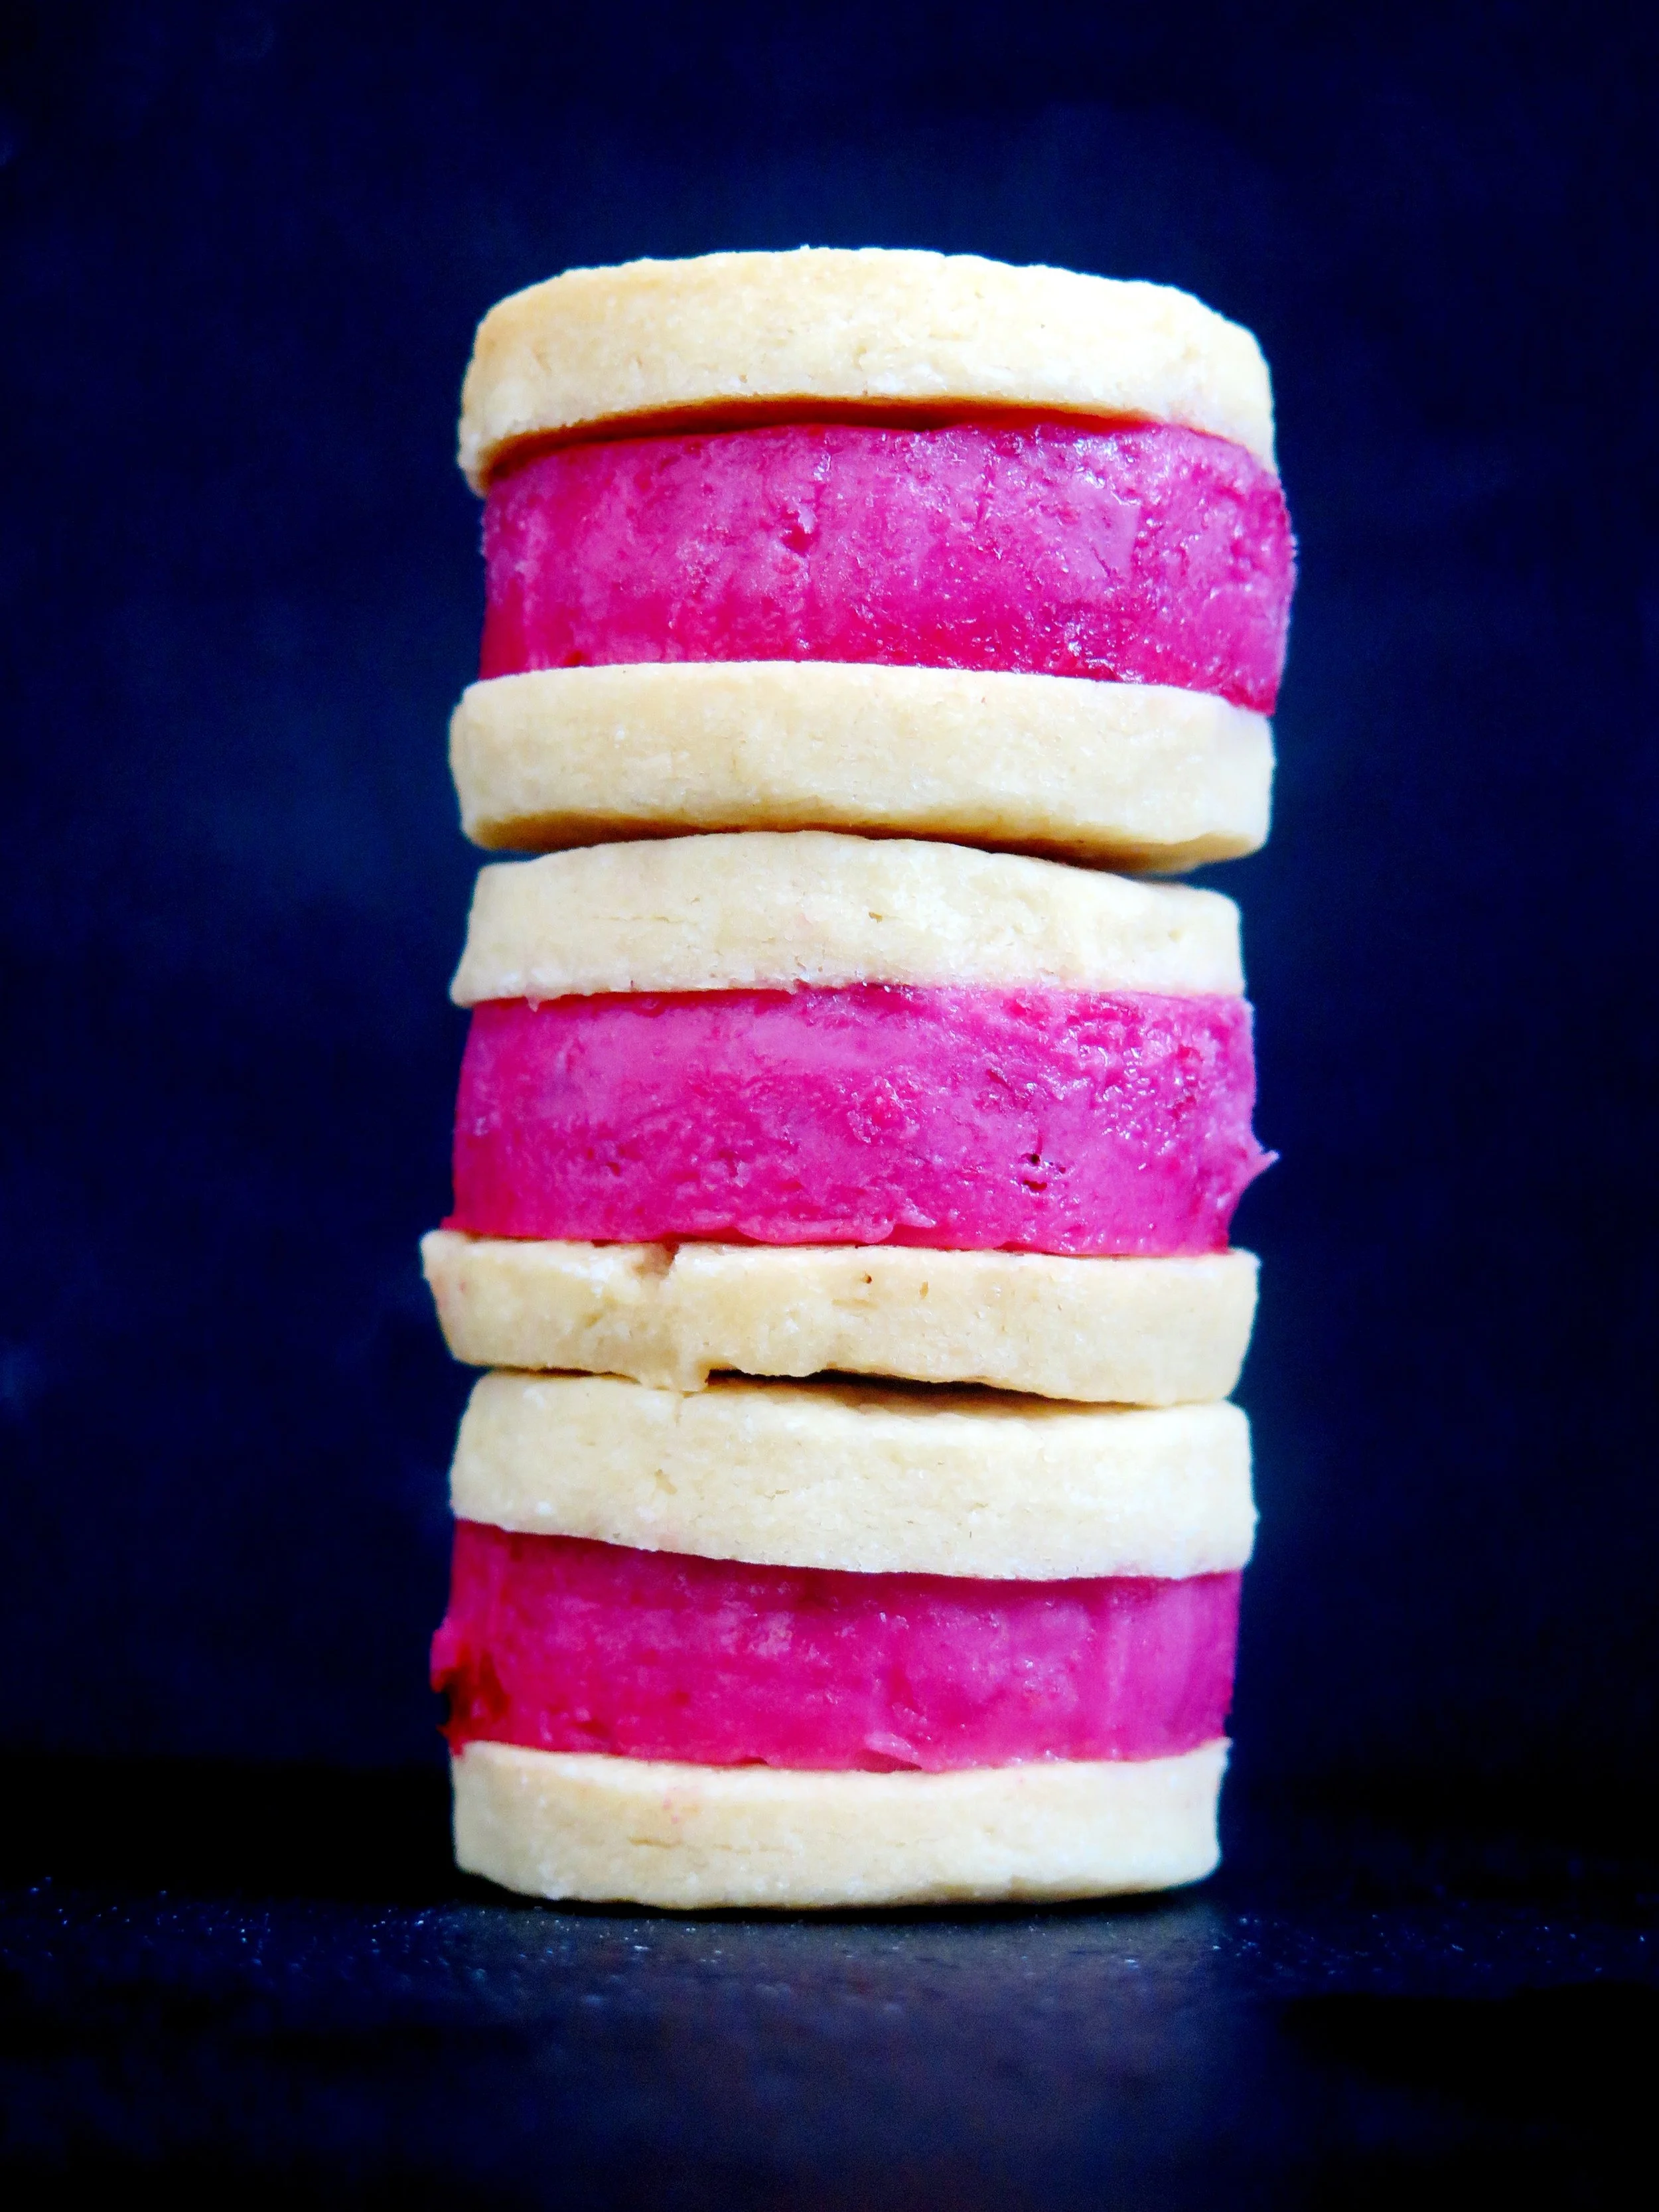
Their Linzer biscuits, however, remind me of Jammie Dodgers – those jam-filled, shortbread biscuits of my childhood that only other people’s mothers allowed – and inspired me to re- interpret them. 

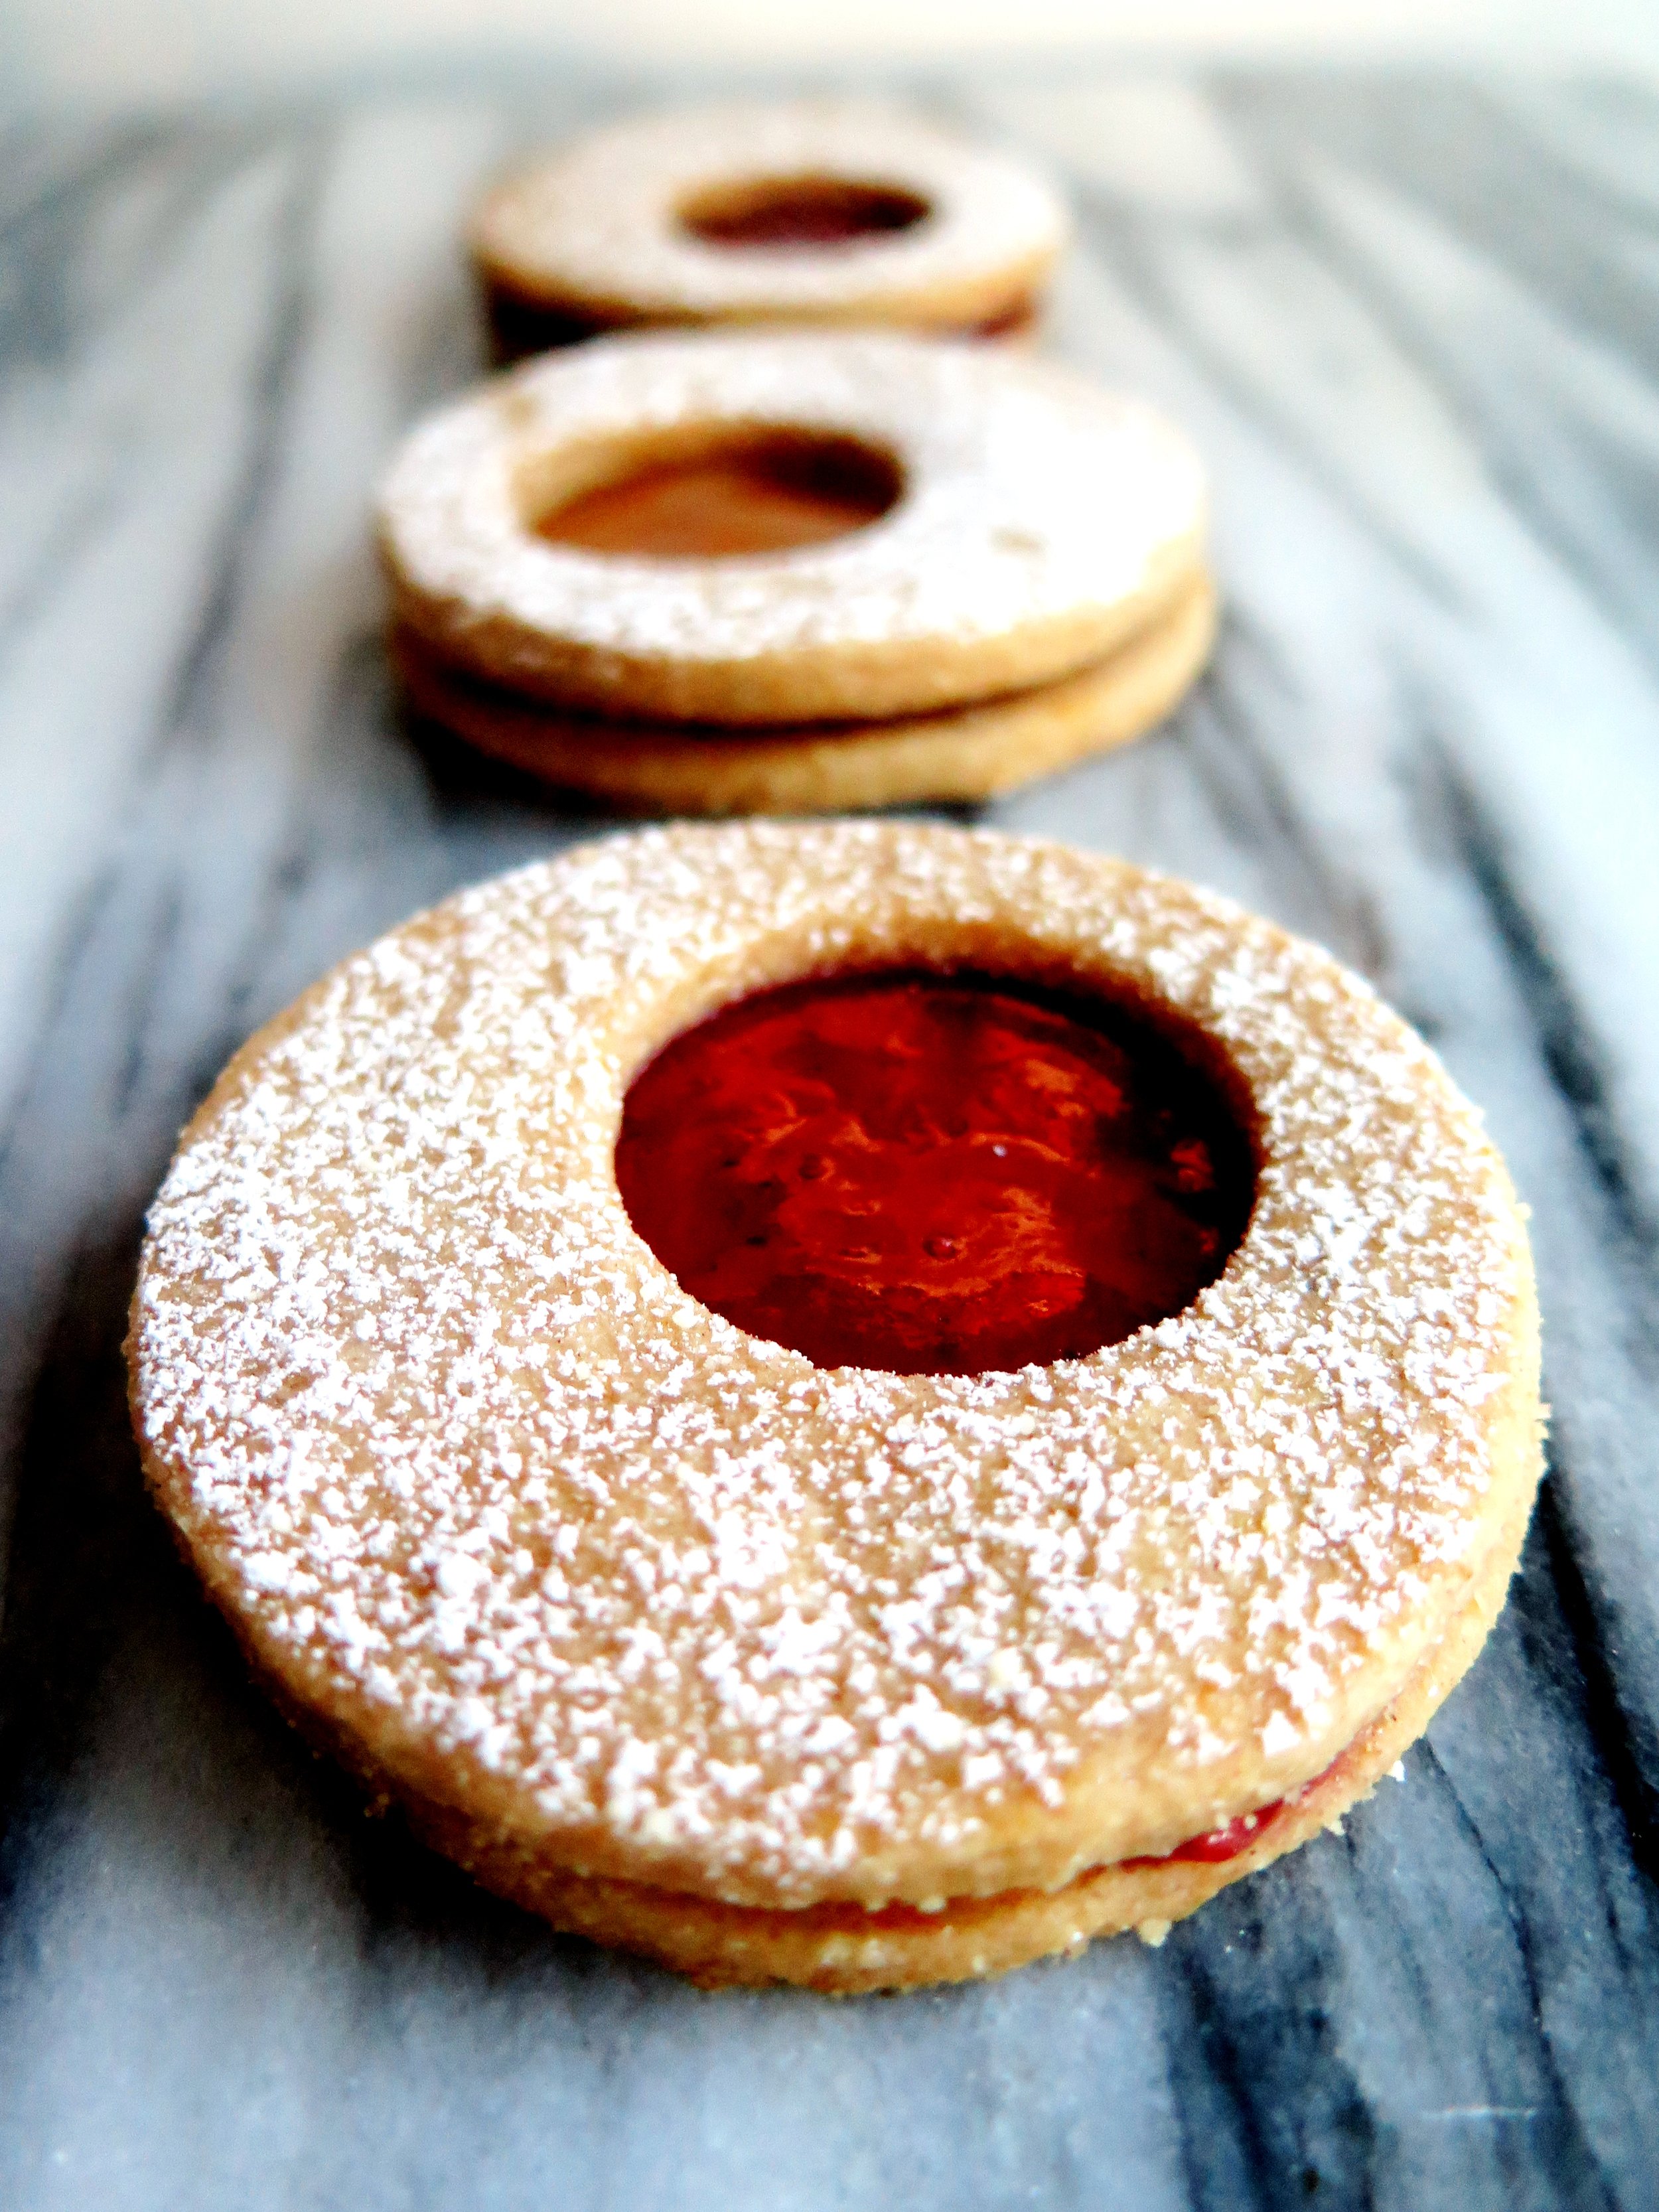
These have a slight Moroccan edge: spiced, delicate with a slight chewiness, filled with the tangy conserve of your choice.

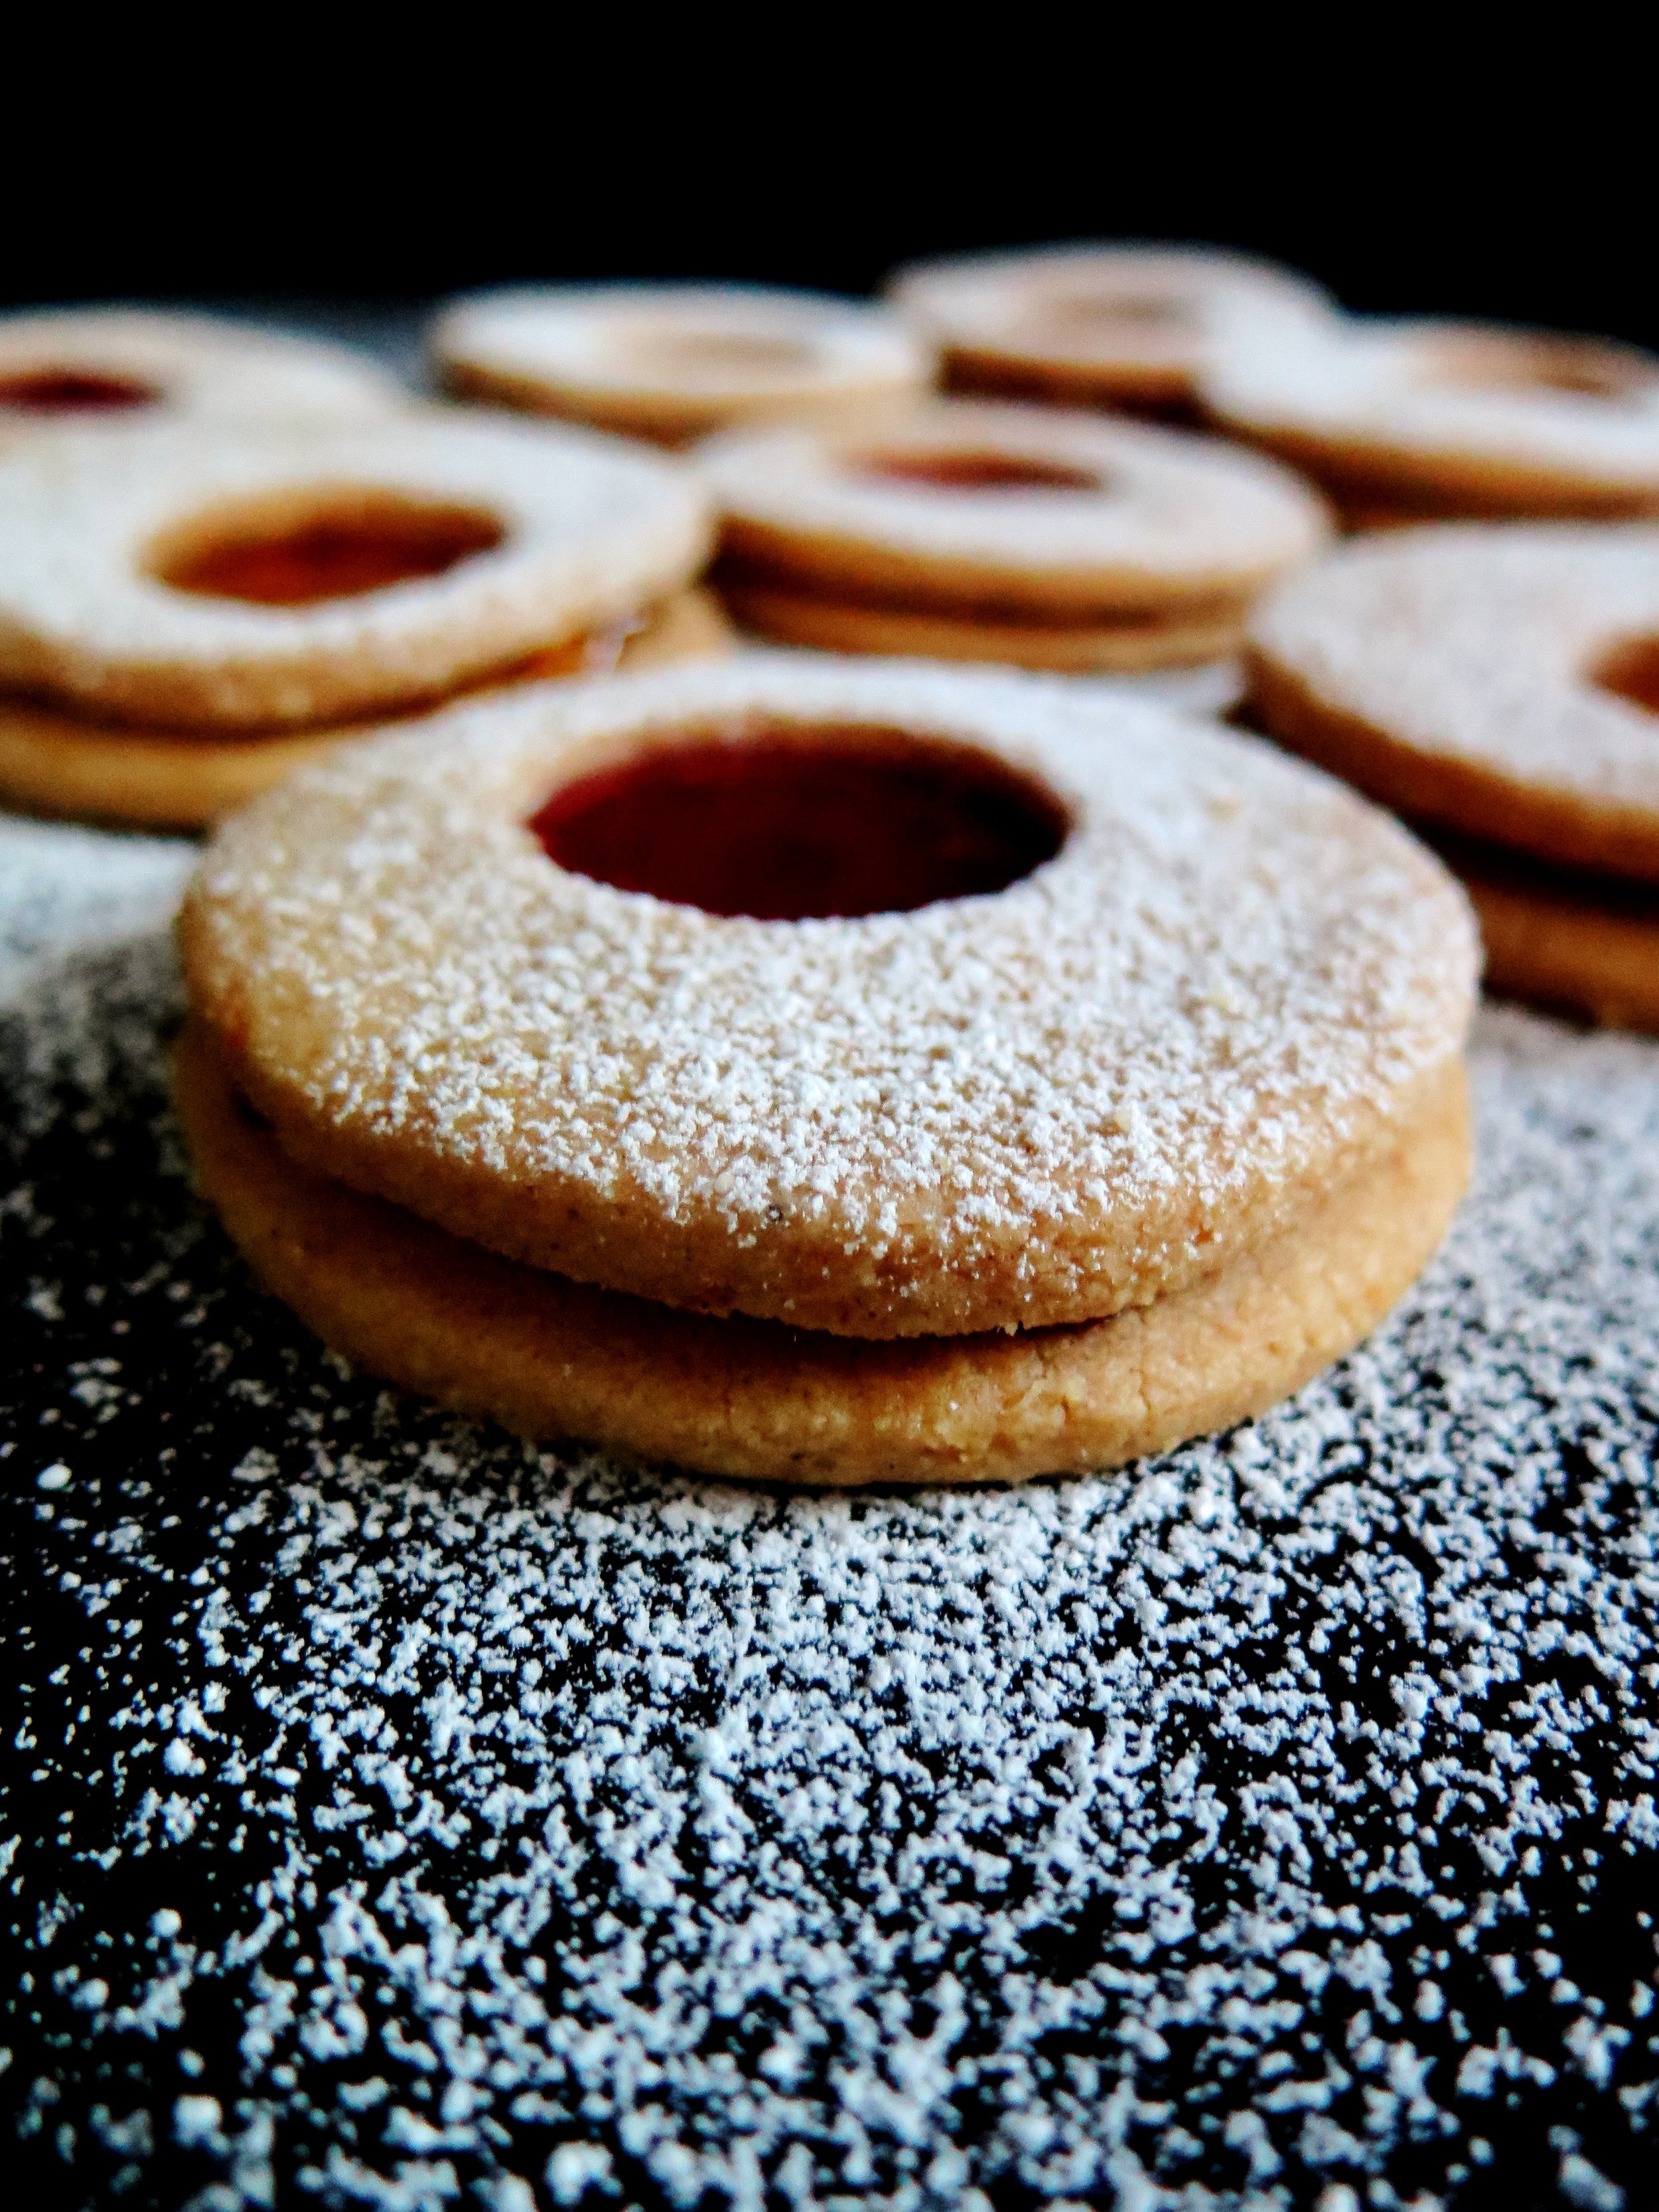
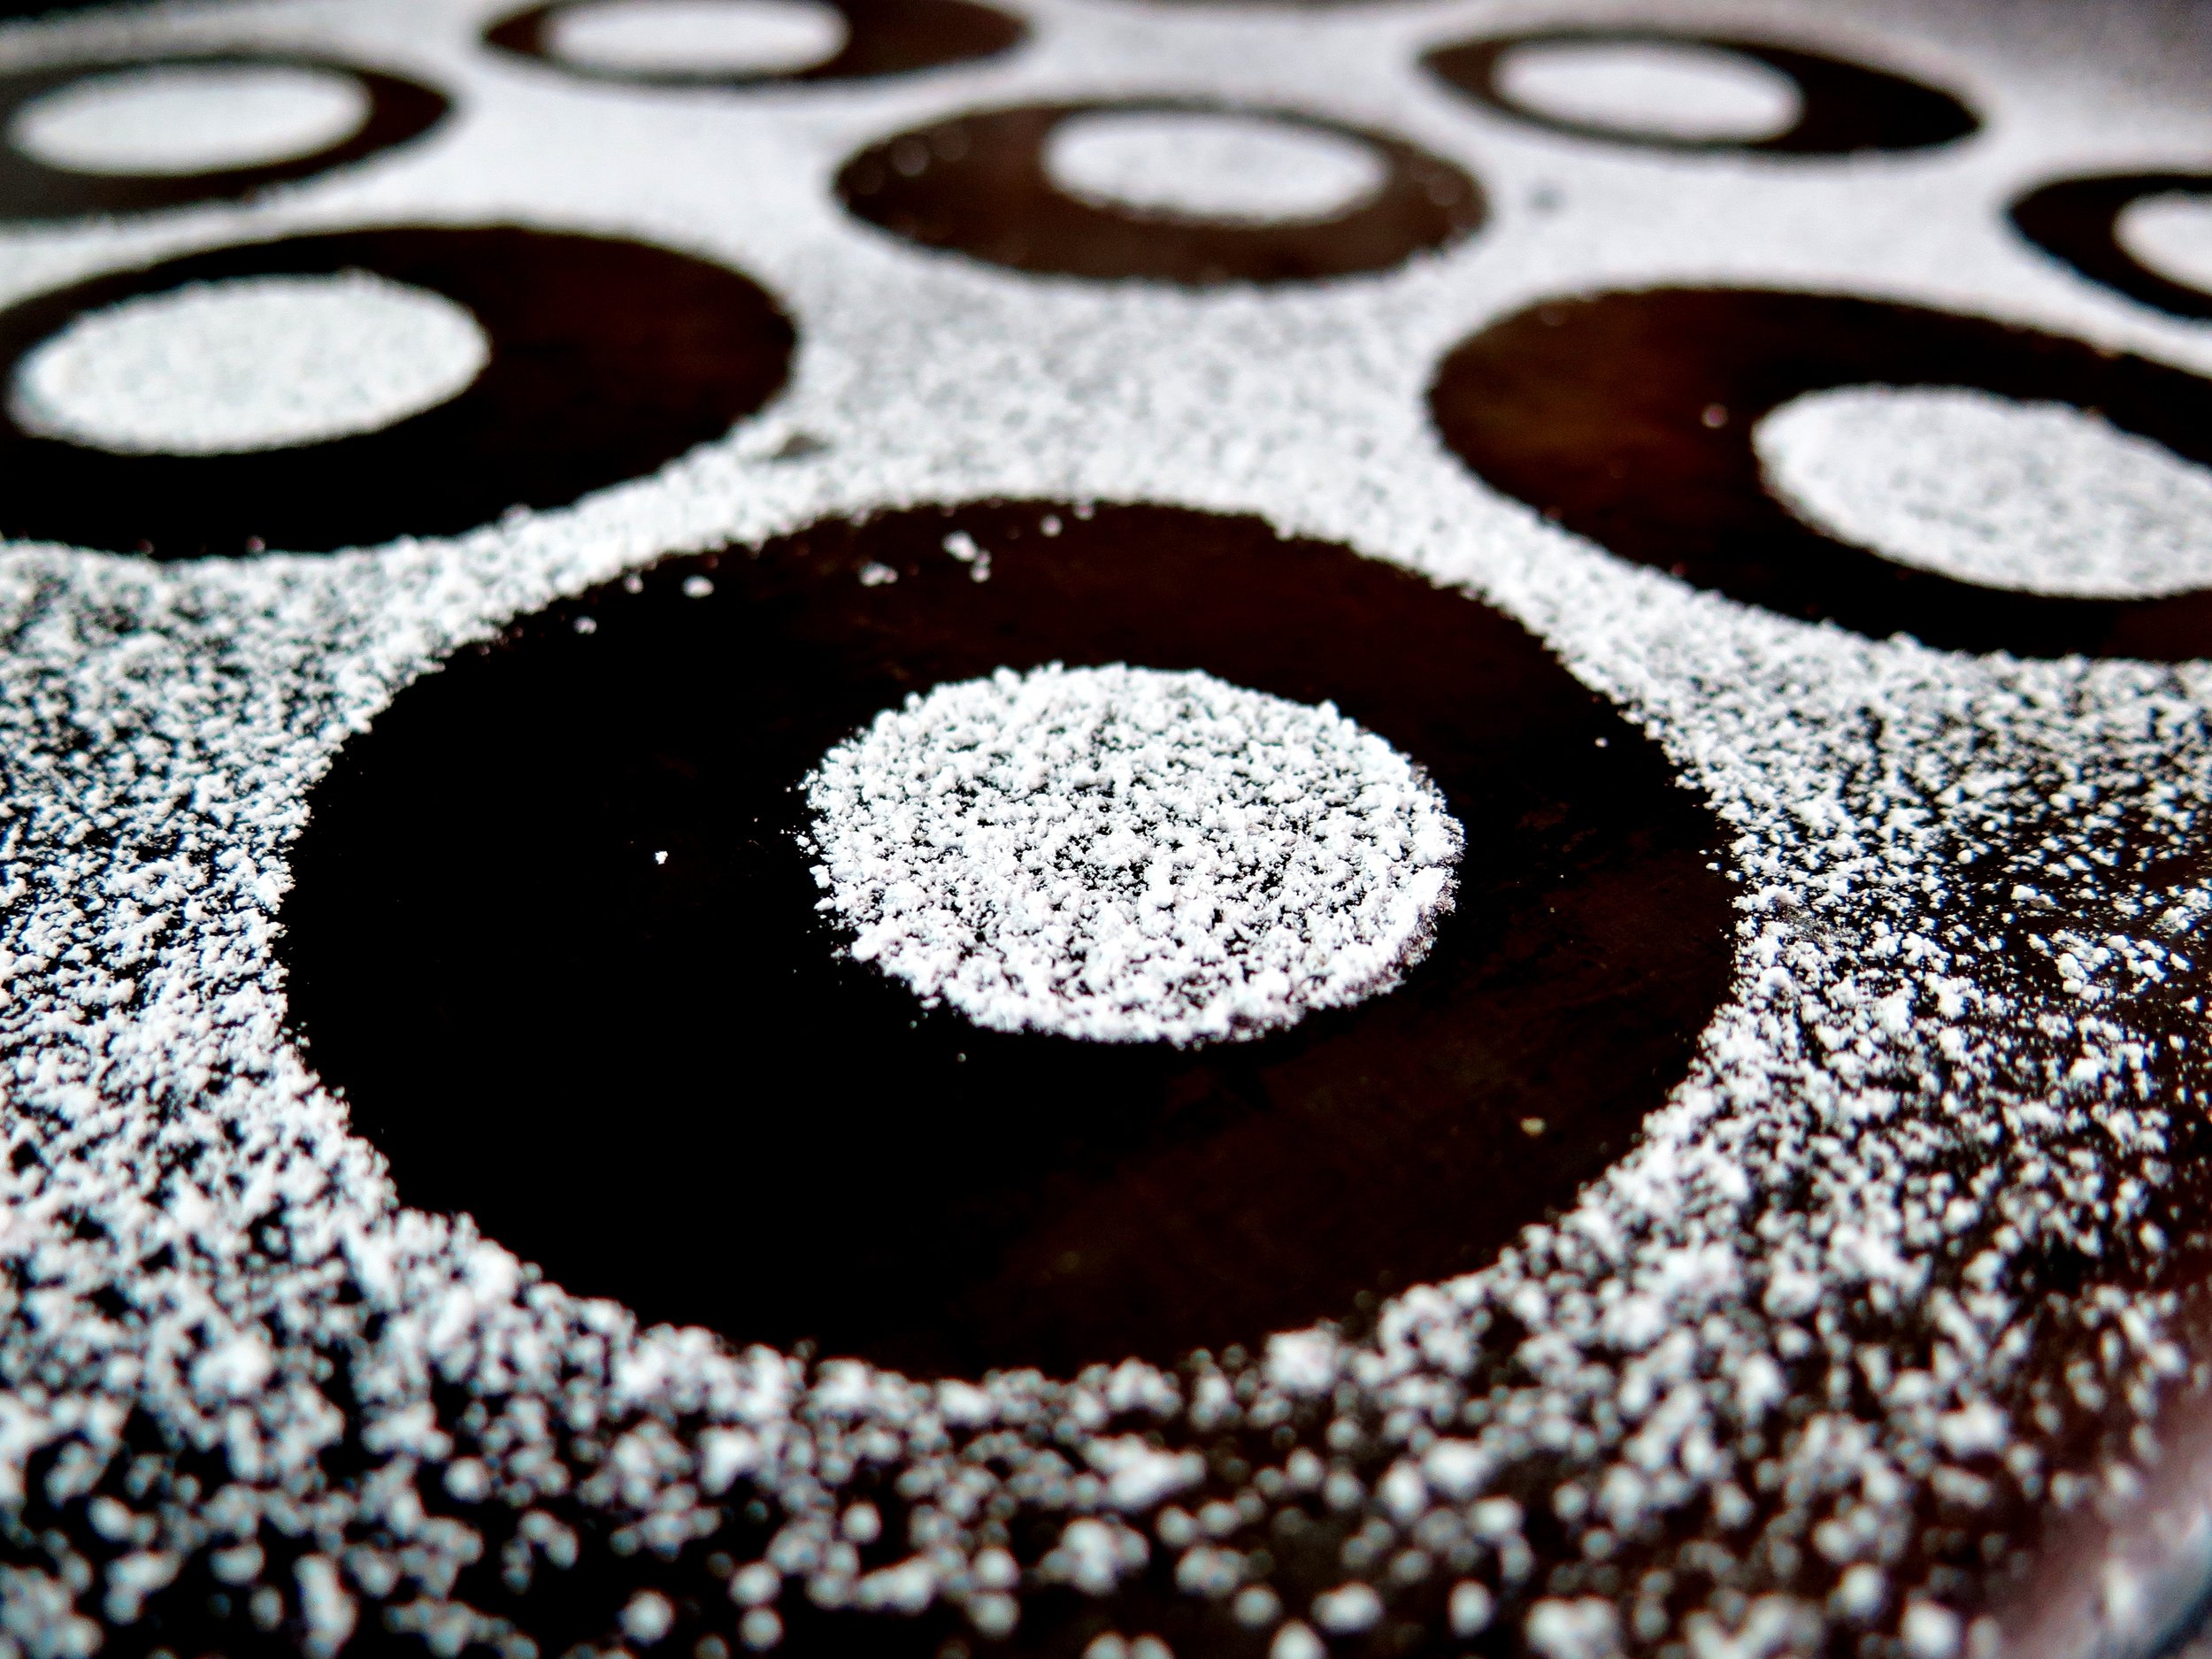
I like marmalade for the tart/bitter contrast against the sweetness of the pastry, but strawberry also works well.  Of course, you can go for any shape, but I am rather taken by the cog-like –quirky take on a Jammie Dodger look.

Ingredients

290g (10.125 ounces) white spelt flour (or plain flour if unavailable)

140g (5 ounces) ground almonds

100g (3.5 ounces) caster sugar

¼ tsp salt

2 ½ tsp cinnamon

¼ tsp ground cloves

¼ tsp almond extract

1 tsp grated lemon zest (about ½ lemon)

1 tsp grated orange zest (about ½ medium orange)

225g (8 ounces) unsalted butter

200g (7 ounces) marmalade or jam of choice (I used marmalade and strawberry)

30g (1 ounce) icing sugar

Large and small cookie cutters (I used 7cm and 3.5cm diameter rings)

2 large baking sheets, lined with baking parhcment

Method

  1. Pour flour, ground almonds, caster sugar, salt cinnoman, cloves,orange and lemons zest, and almond extract into a food processor and pulse until fully combined.  Add in the chopped butter and pulse again until the mixture forms a damp sand-like texture.  Keep pulsing until it clumps tighter to form a dough.
  2. Divide the dough into two rounds and flatten both onto sheets of baking parchment, wrap them and place them in the freezer for about 20 minutes or the fridge for an hour.
  3. Preheat the oven to 160˚C (325˚F). Remove the disks of dough from the freezer/fridge – if they are too firm to roll, let them sit for a few minutes.  Ona thoroughly floured board, roll one disk out to a 3mm (1/8 inch) thickness. Cut out as many cookies as possible and set aside the scraps.  Space the disks out on the baking trays as you go. Repeat with the second disk and use the smaller cutter to cut out small holes from the rounds.  Press together the accumulated scraps and roll out again.  Make sure there are an equal number of whole circles to circles with a cut out circle.  A tip to avoid the cutter sticking in the dough is to dip it in flour first.
  4. Place the trays in the oven and bake for 12- 15 minutes until the cookies are golden but still soft to the touch – they will continue to cook as they cool. When cool, for aesthetic effect, sieve the icing sugar onto the rounds with the circles cut out of them. Then spread a teaspoon of the jam/marmalade onto the complete circles, and lightly press the cut-out layer on top.  Devour, delicately, of course…
Morroccan Spiced Linzer Jam Cookies

Comment

Strawberry Crumble Bars

Comment

Strawberry Crumble Bars

IMG_4993.jpg

Strawberry Crumble Bars 
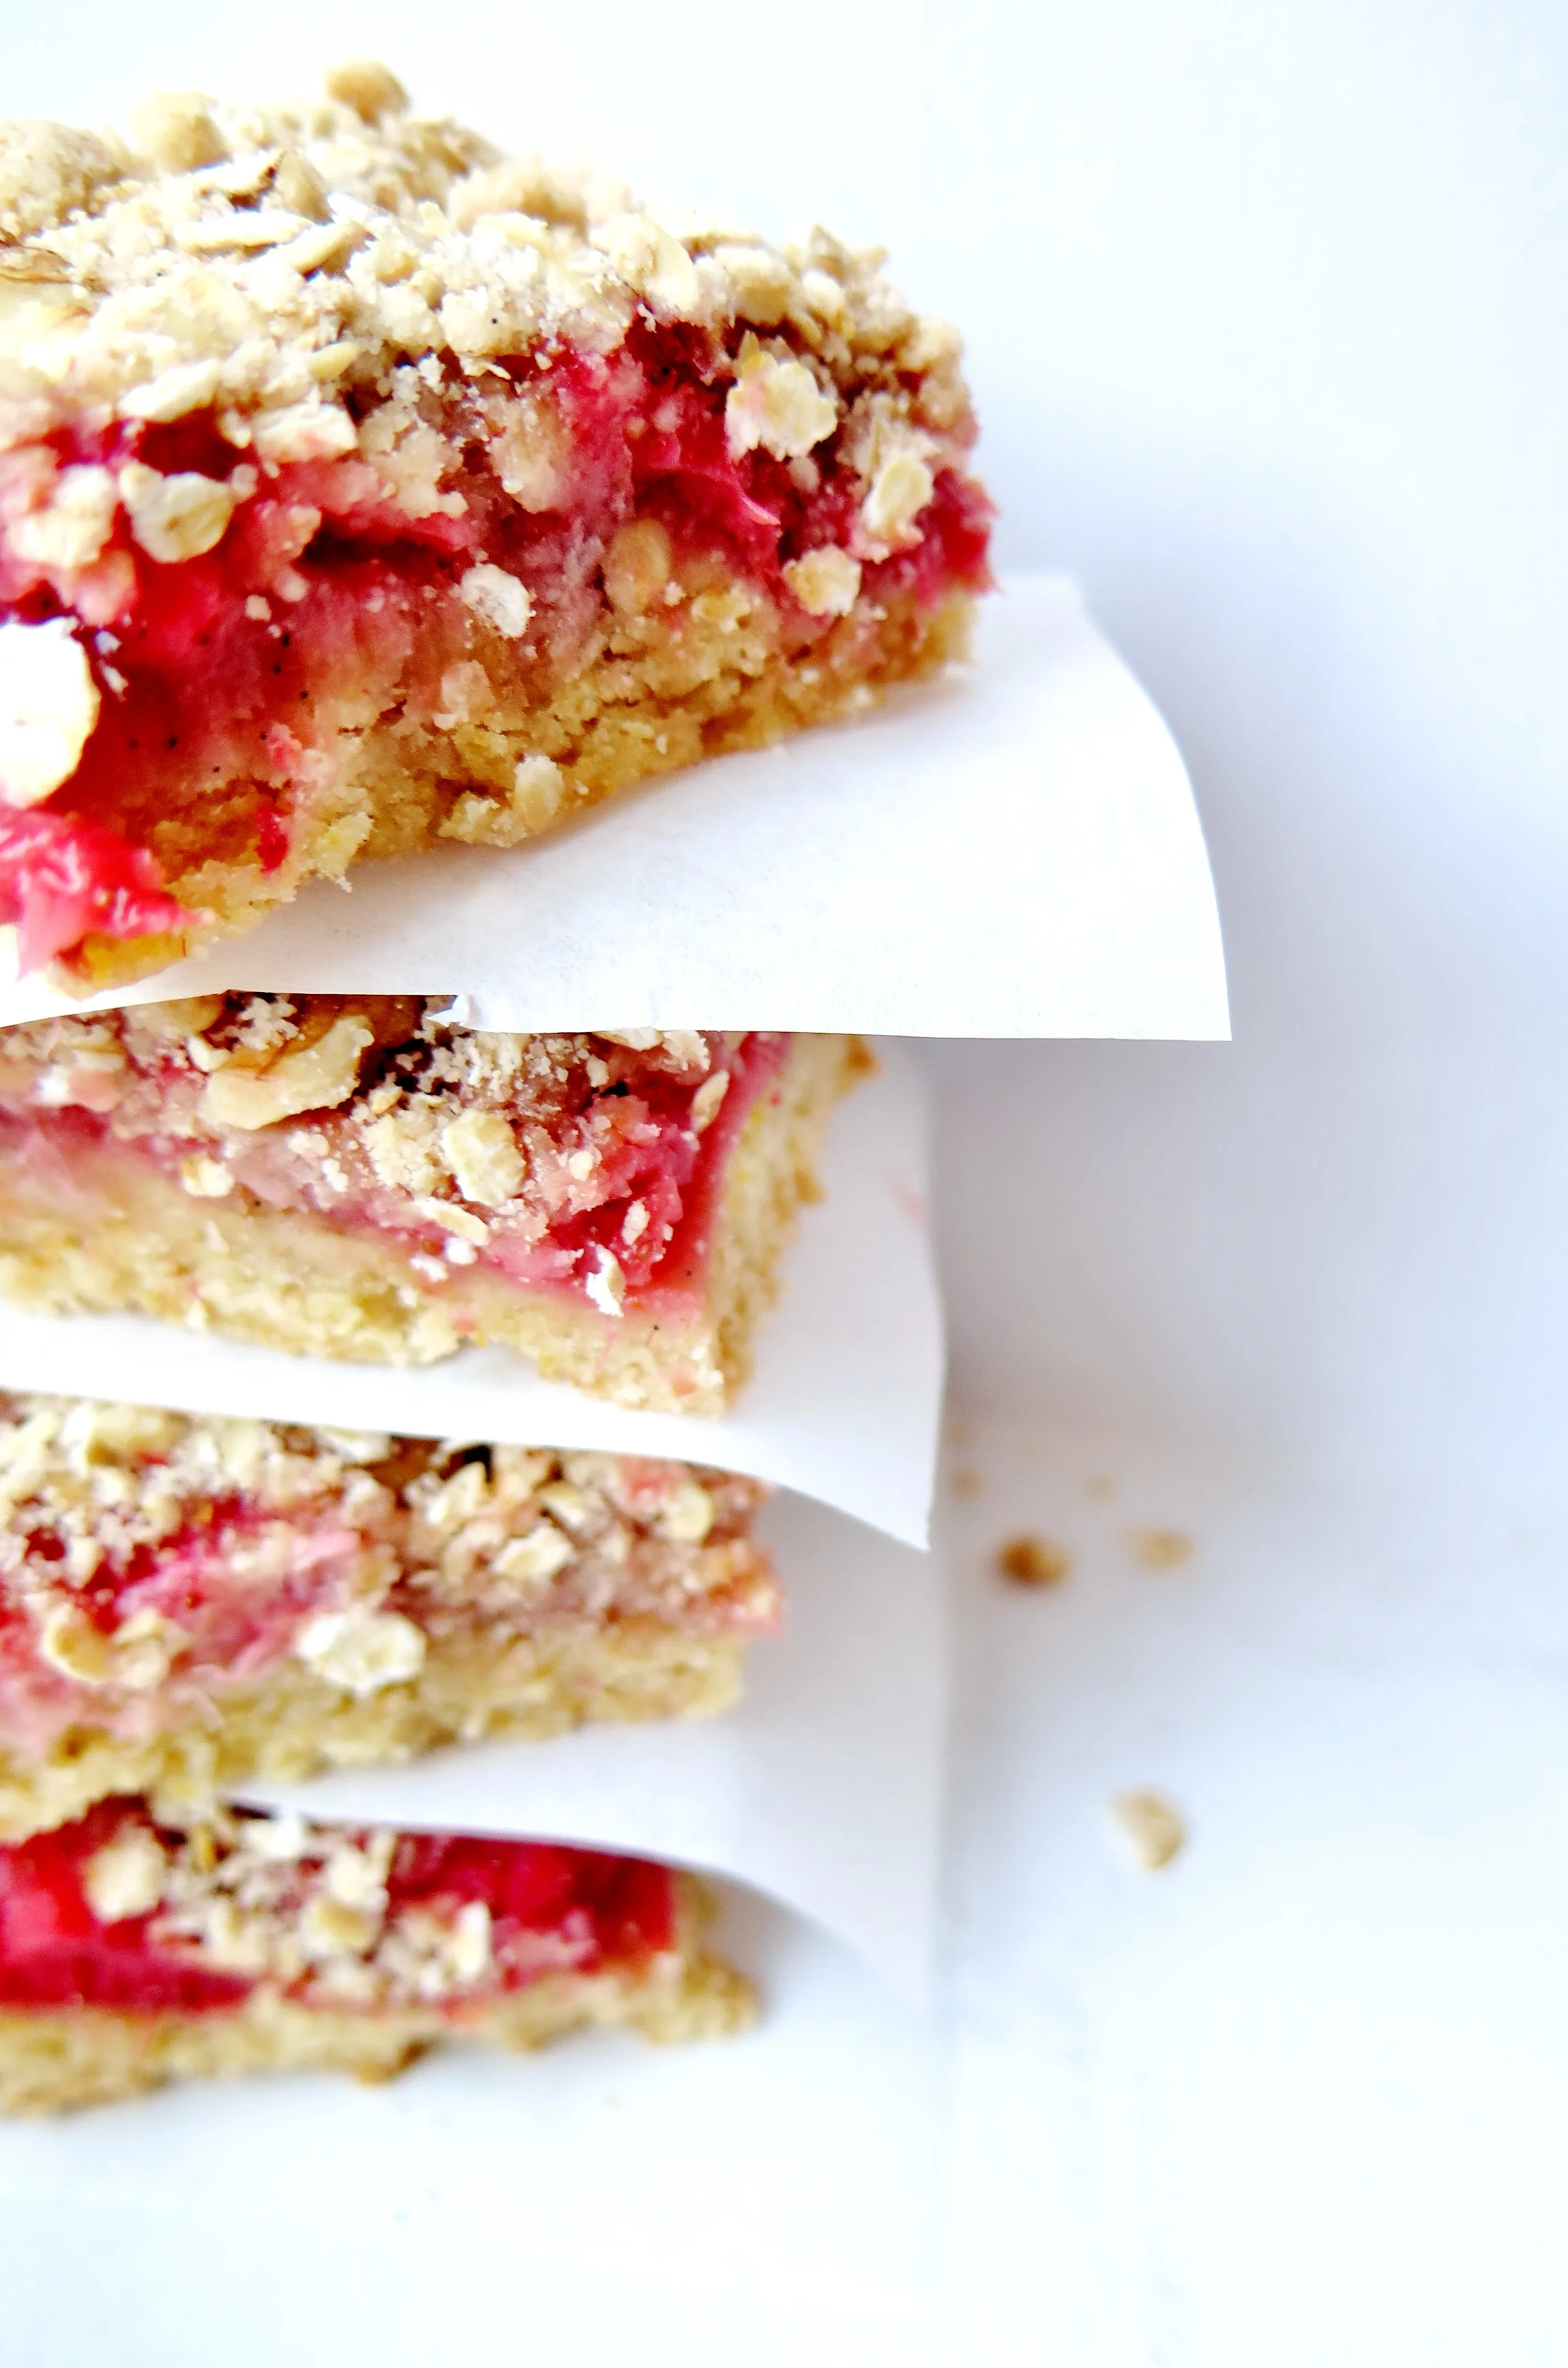
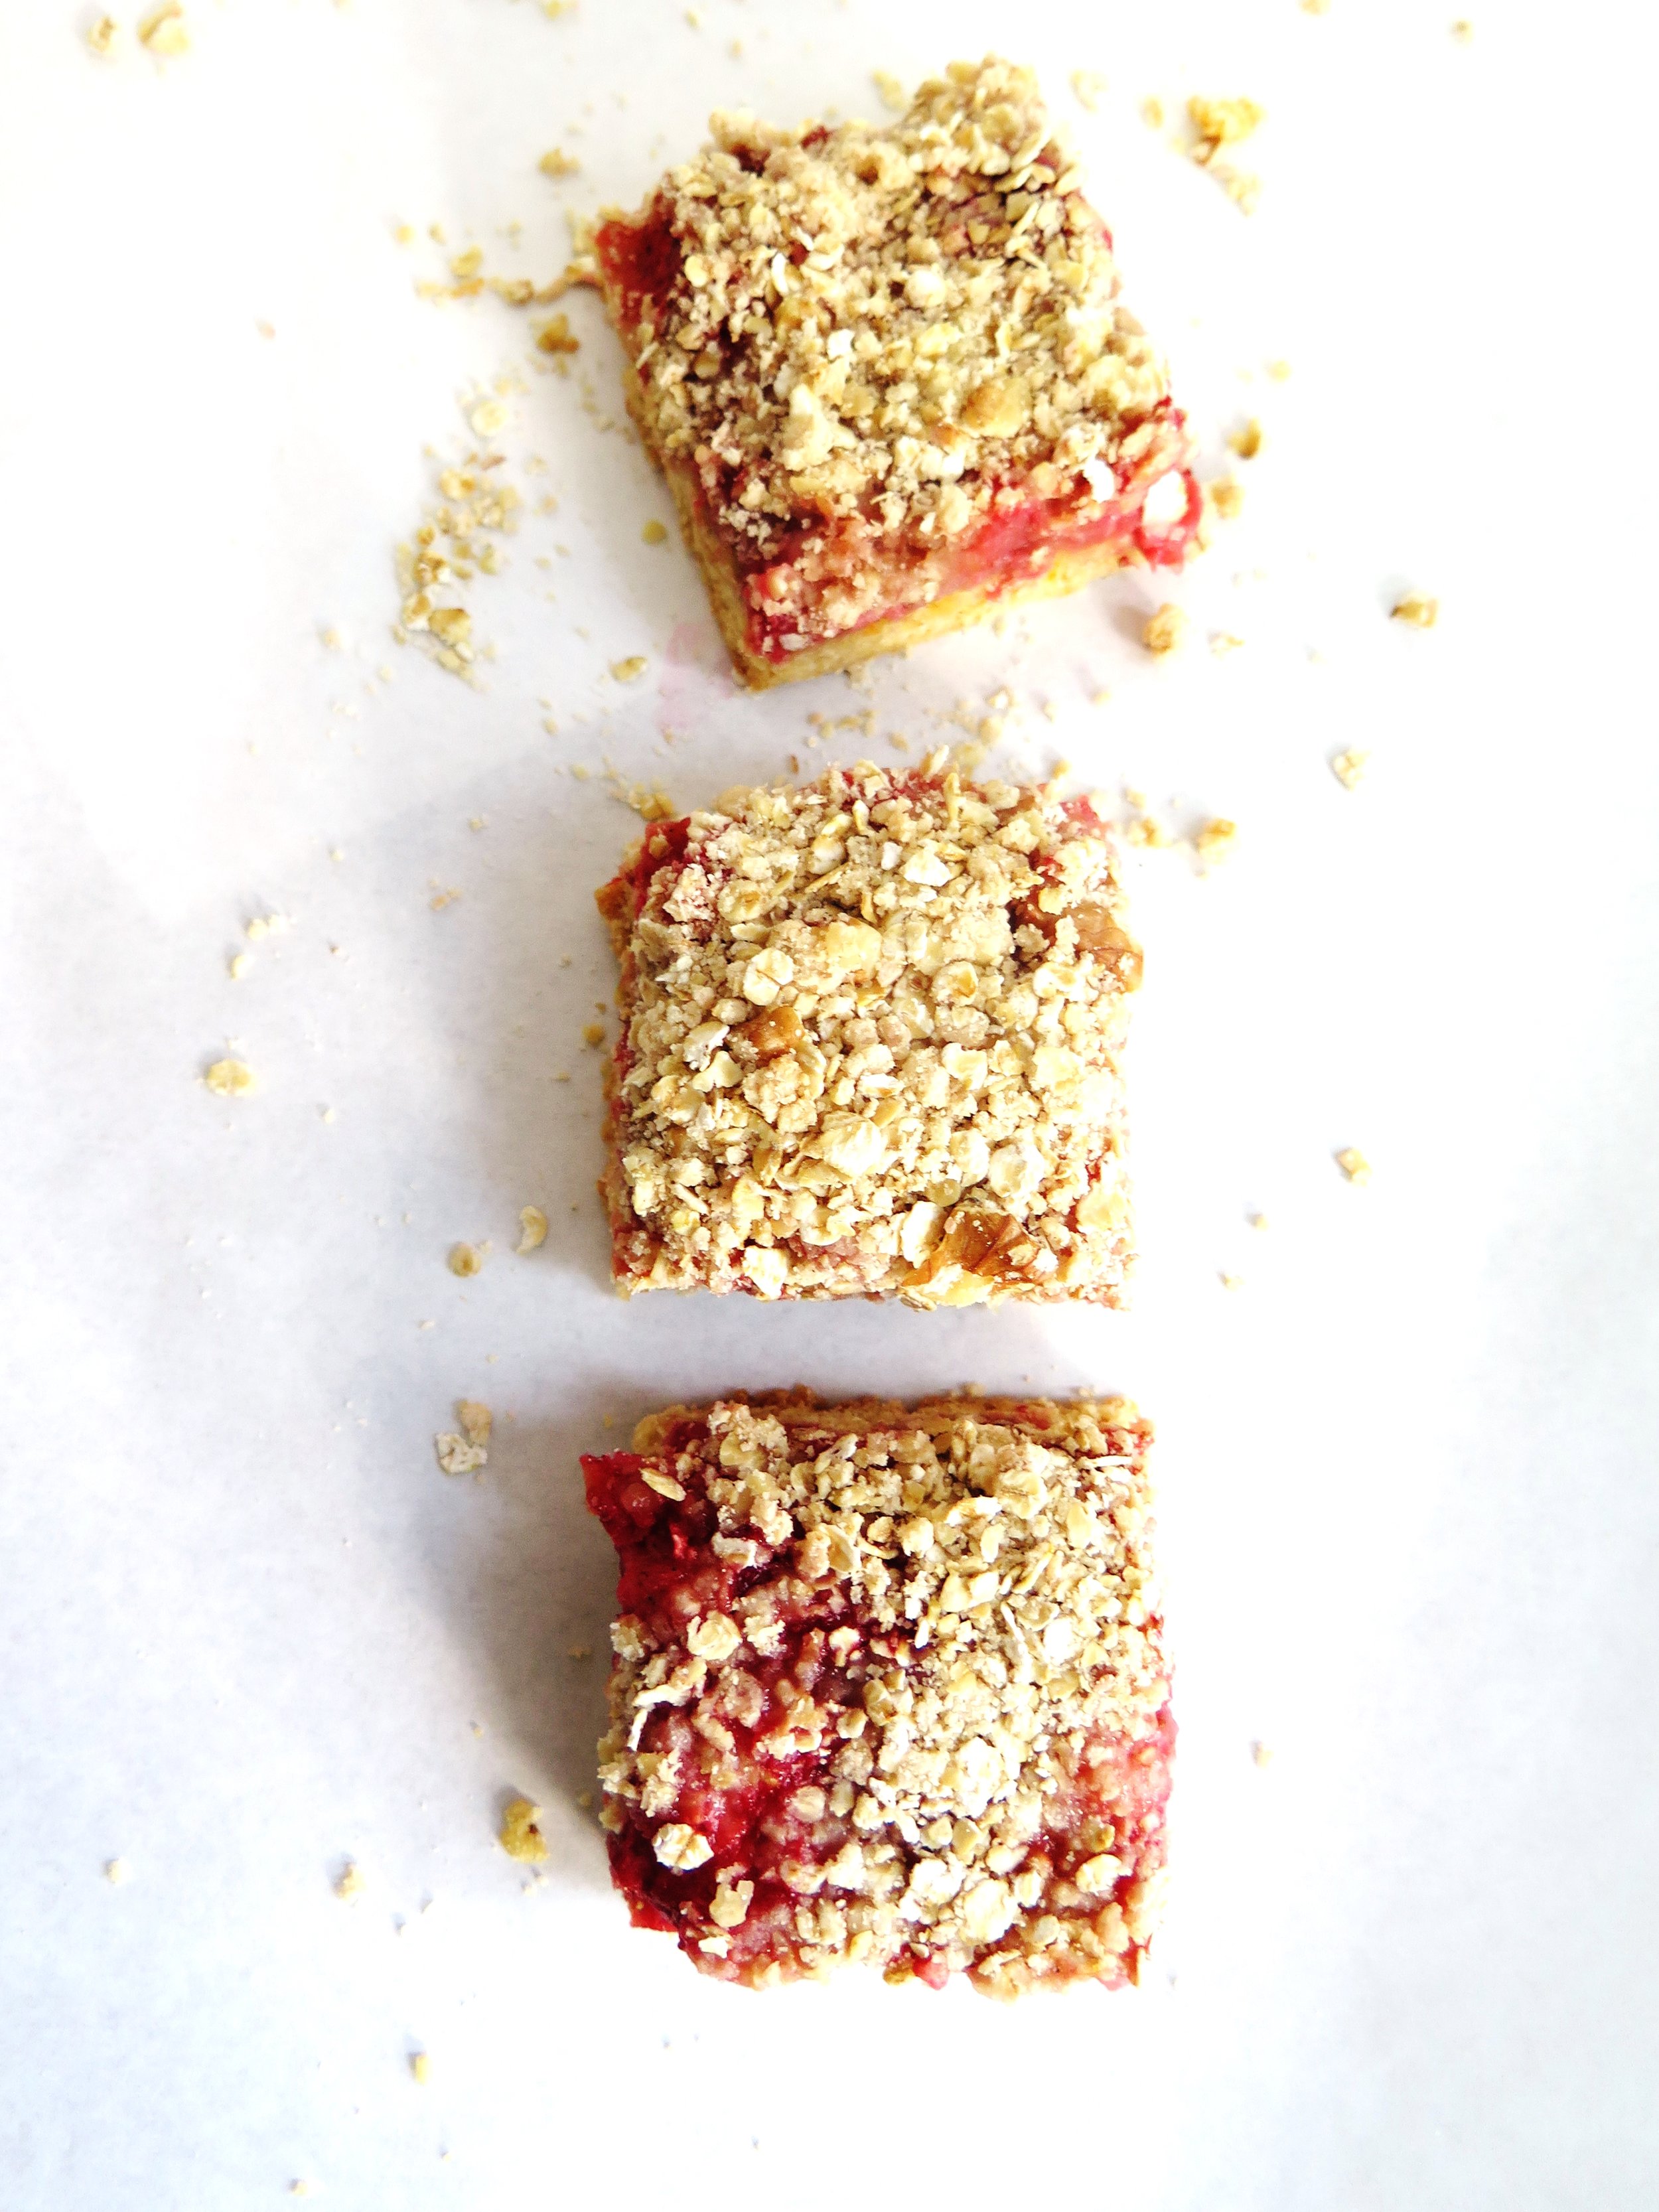
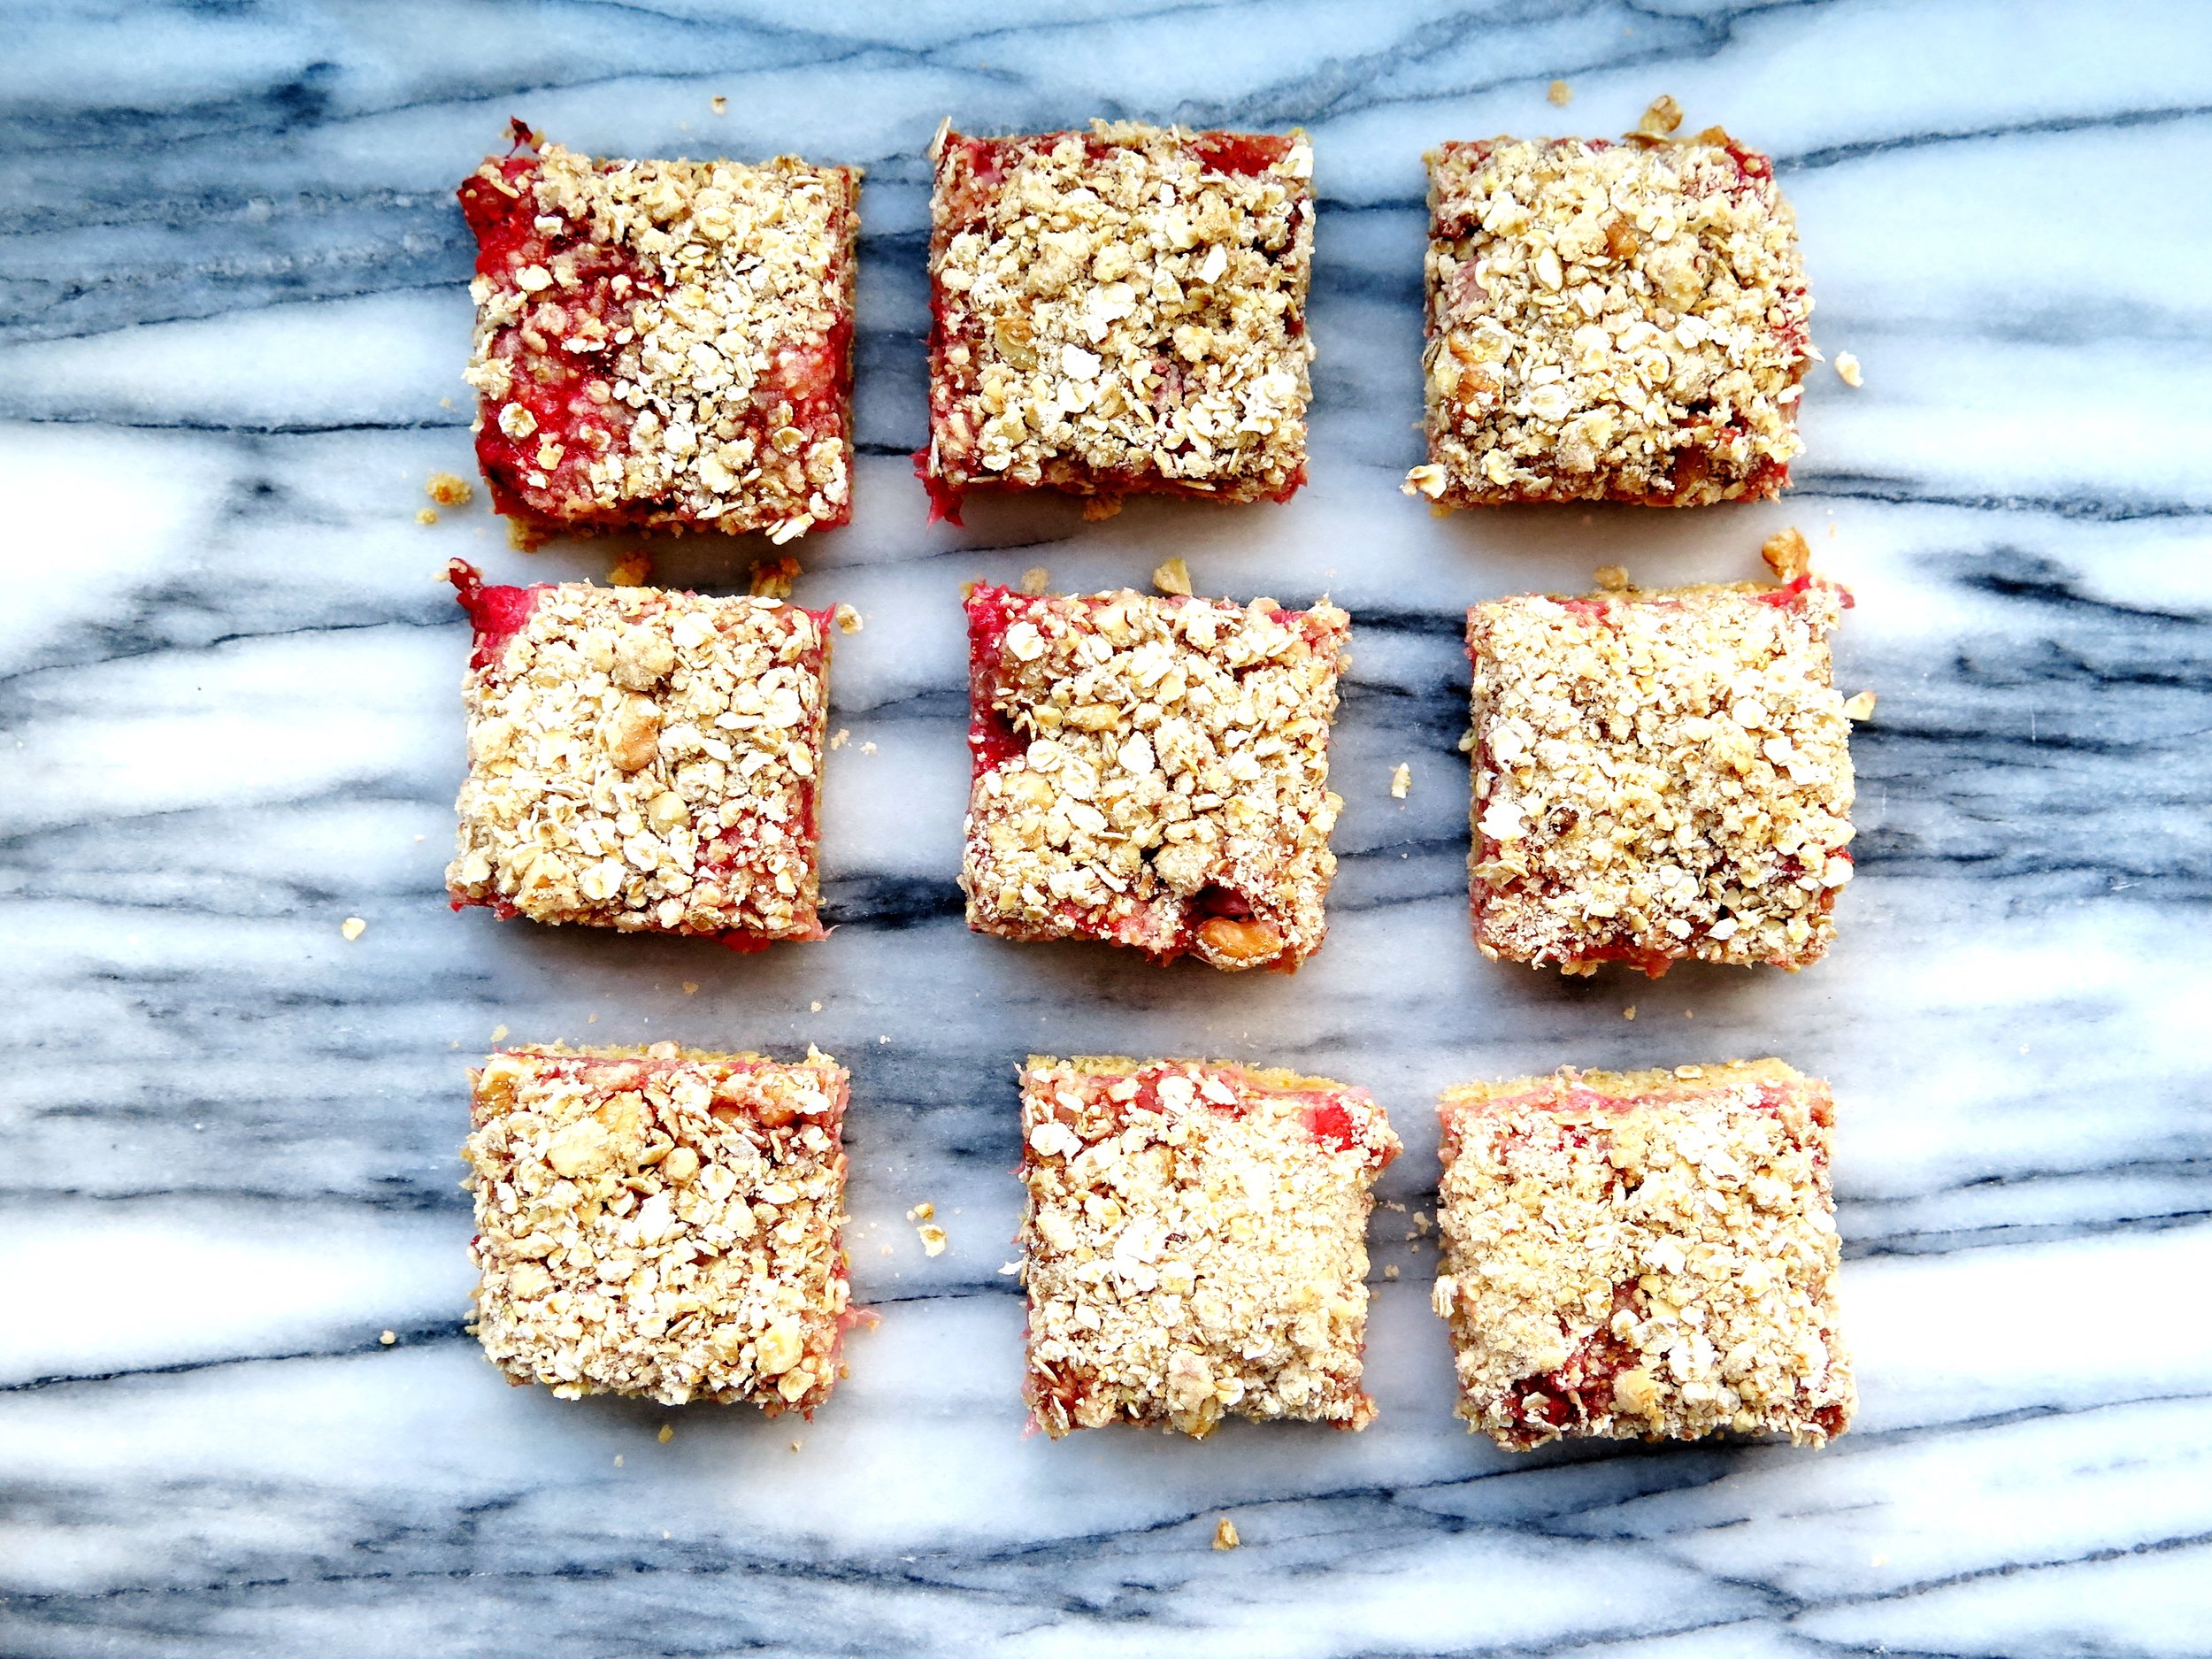
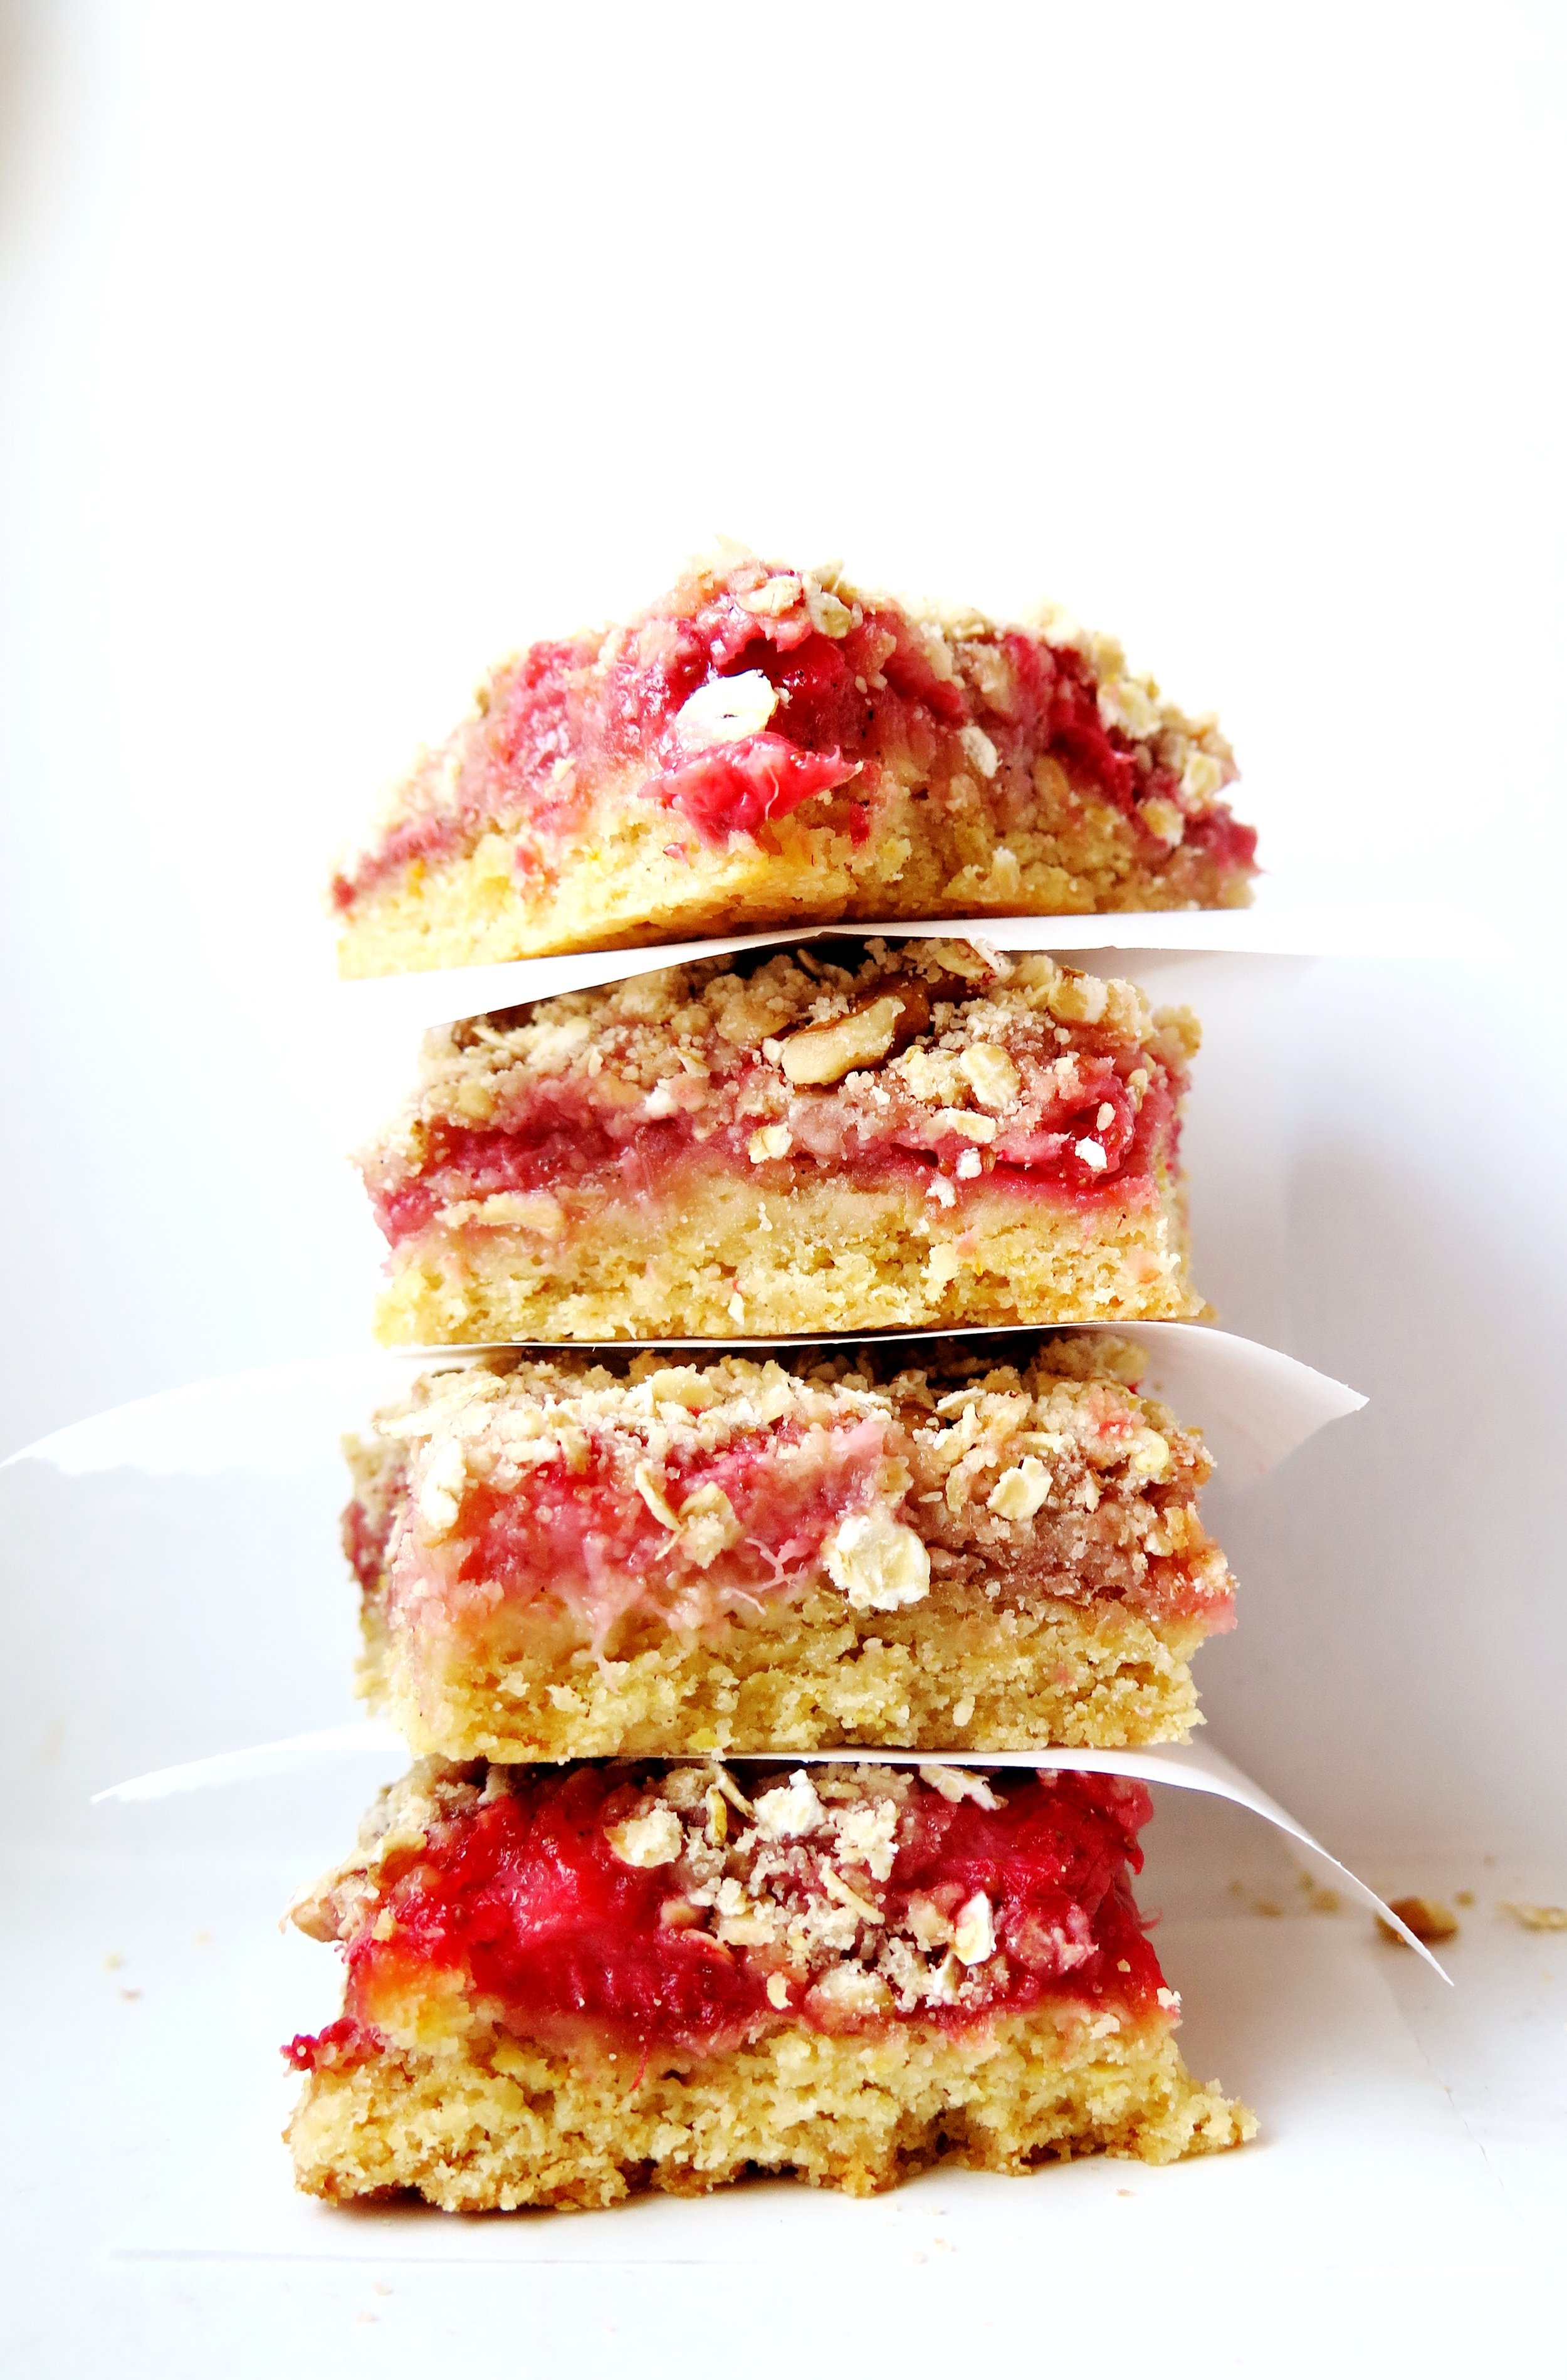
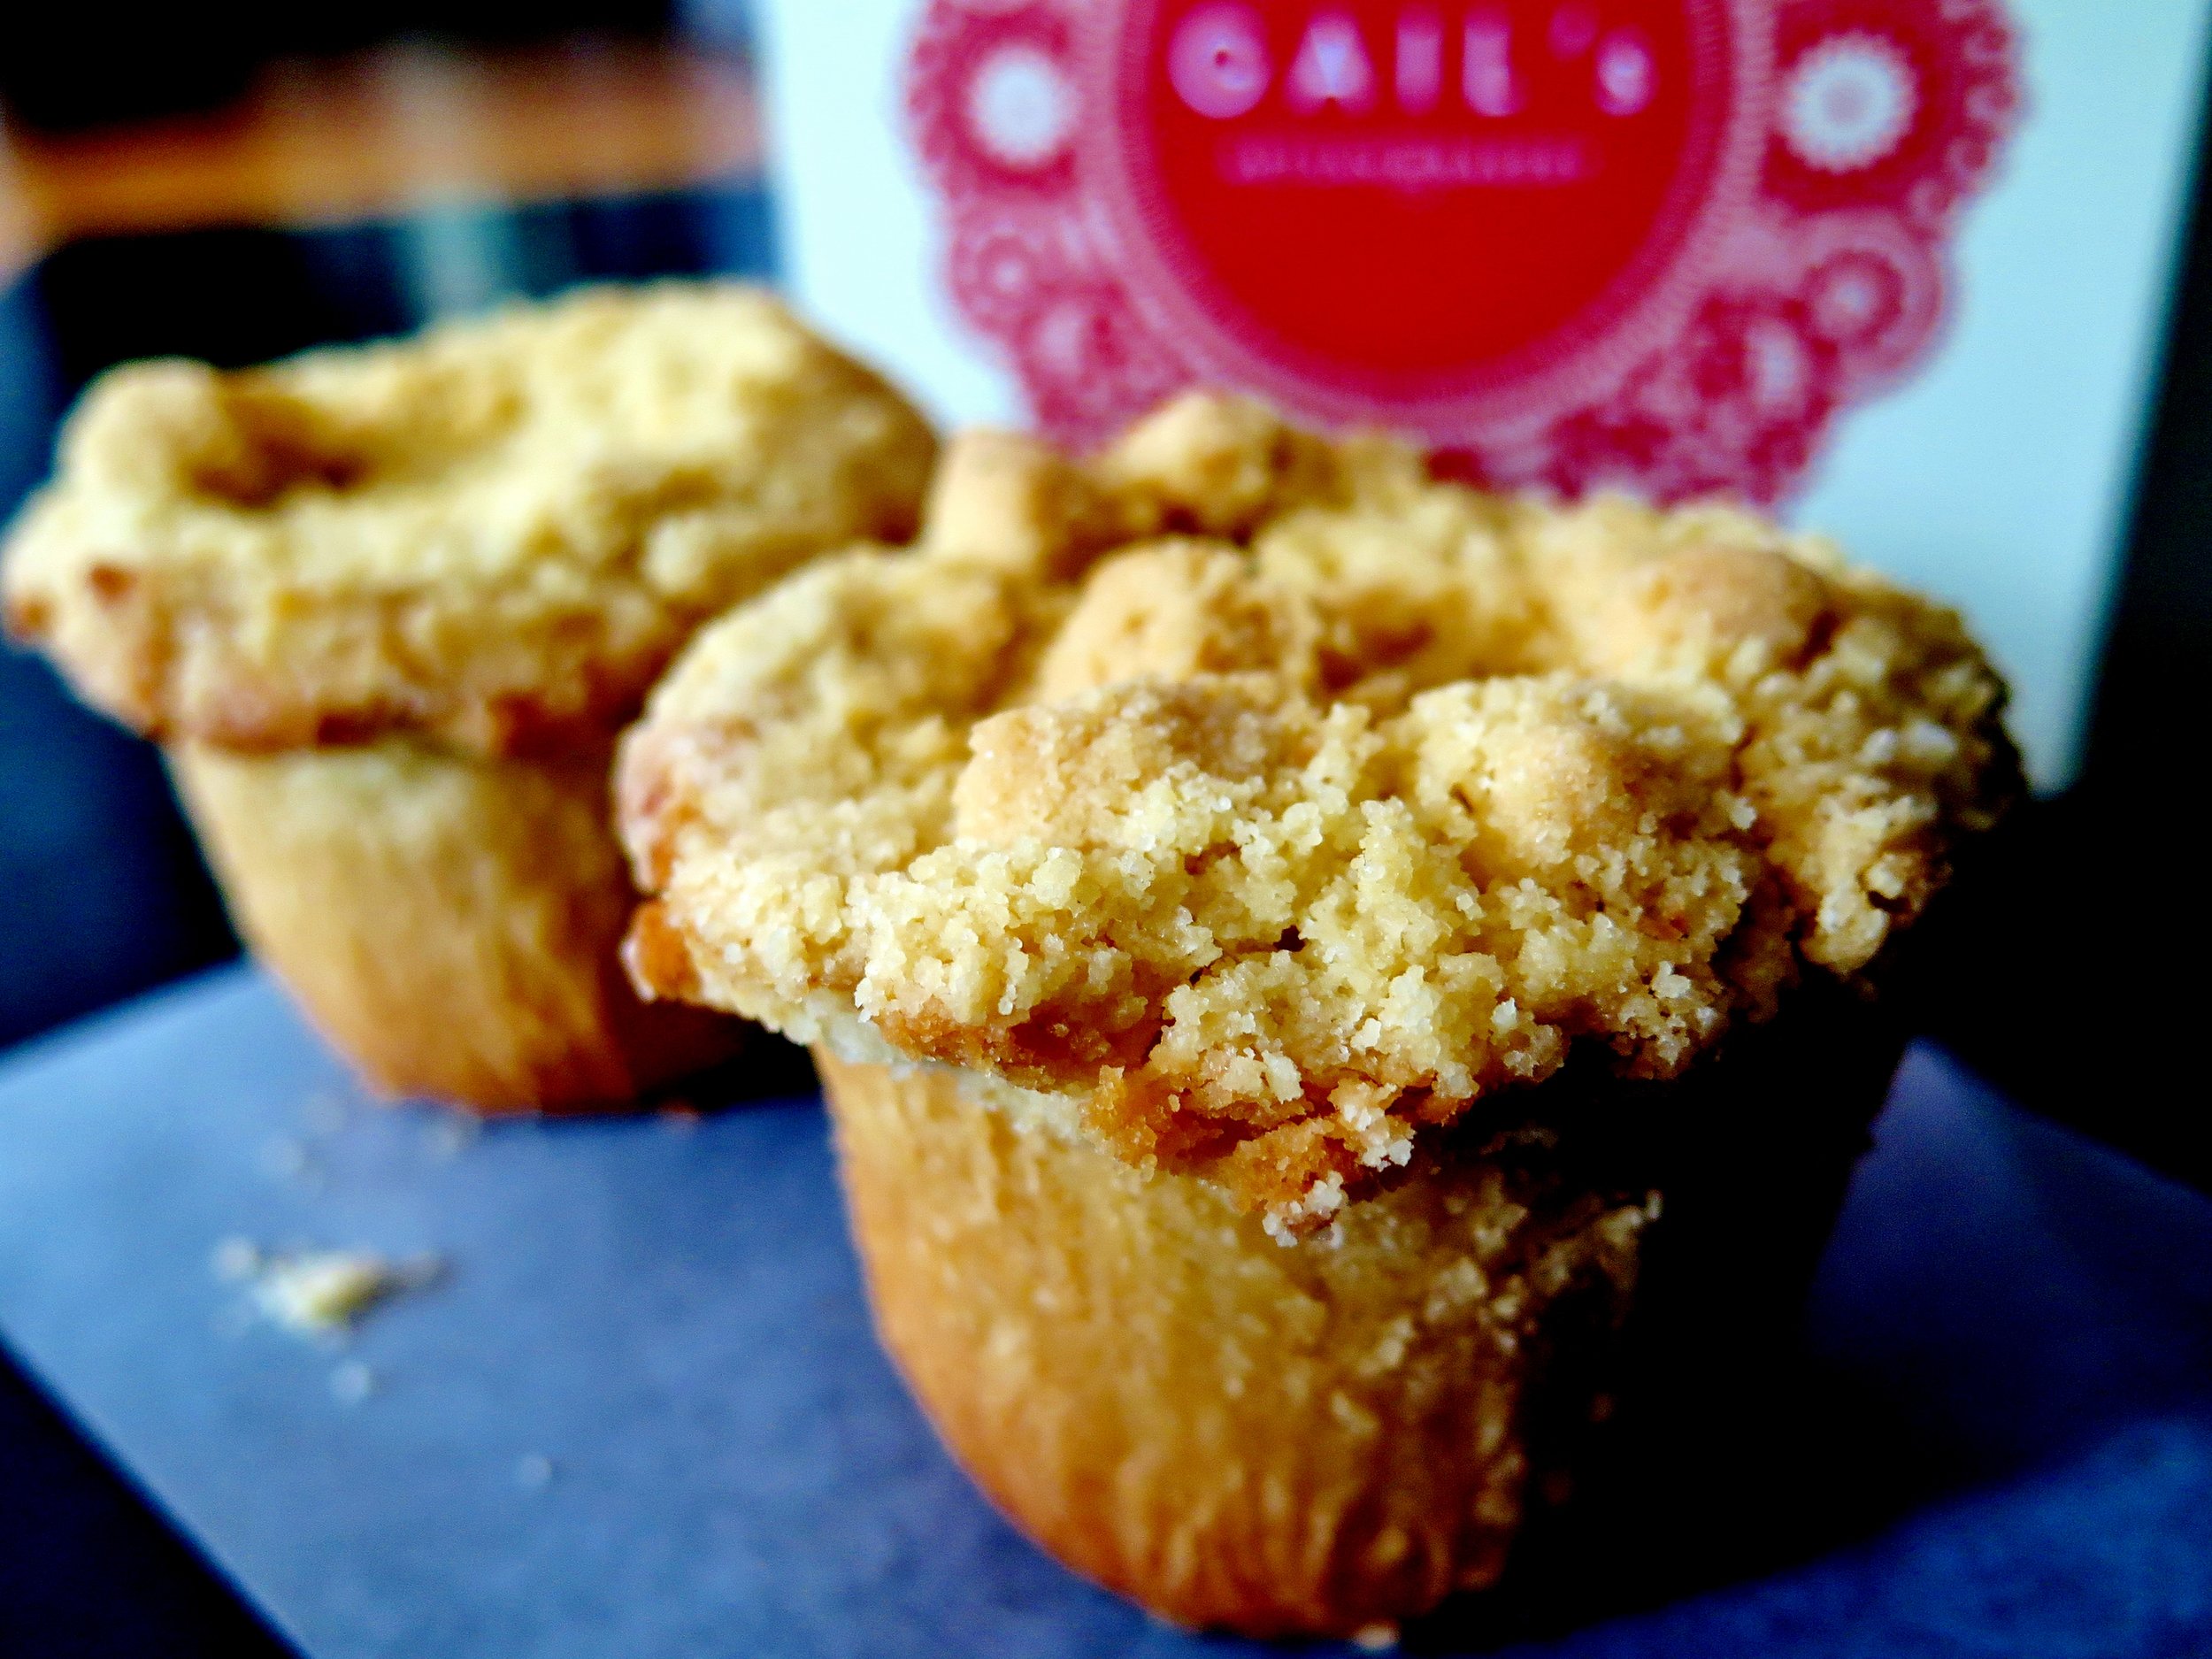
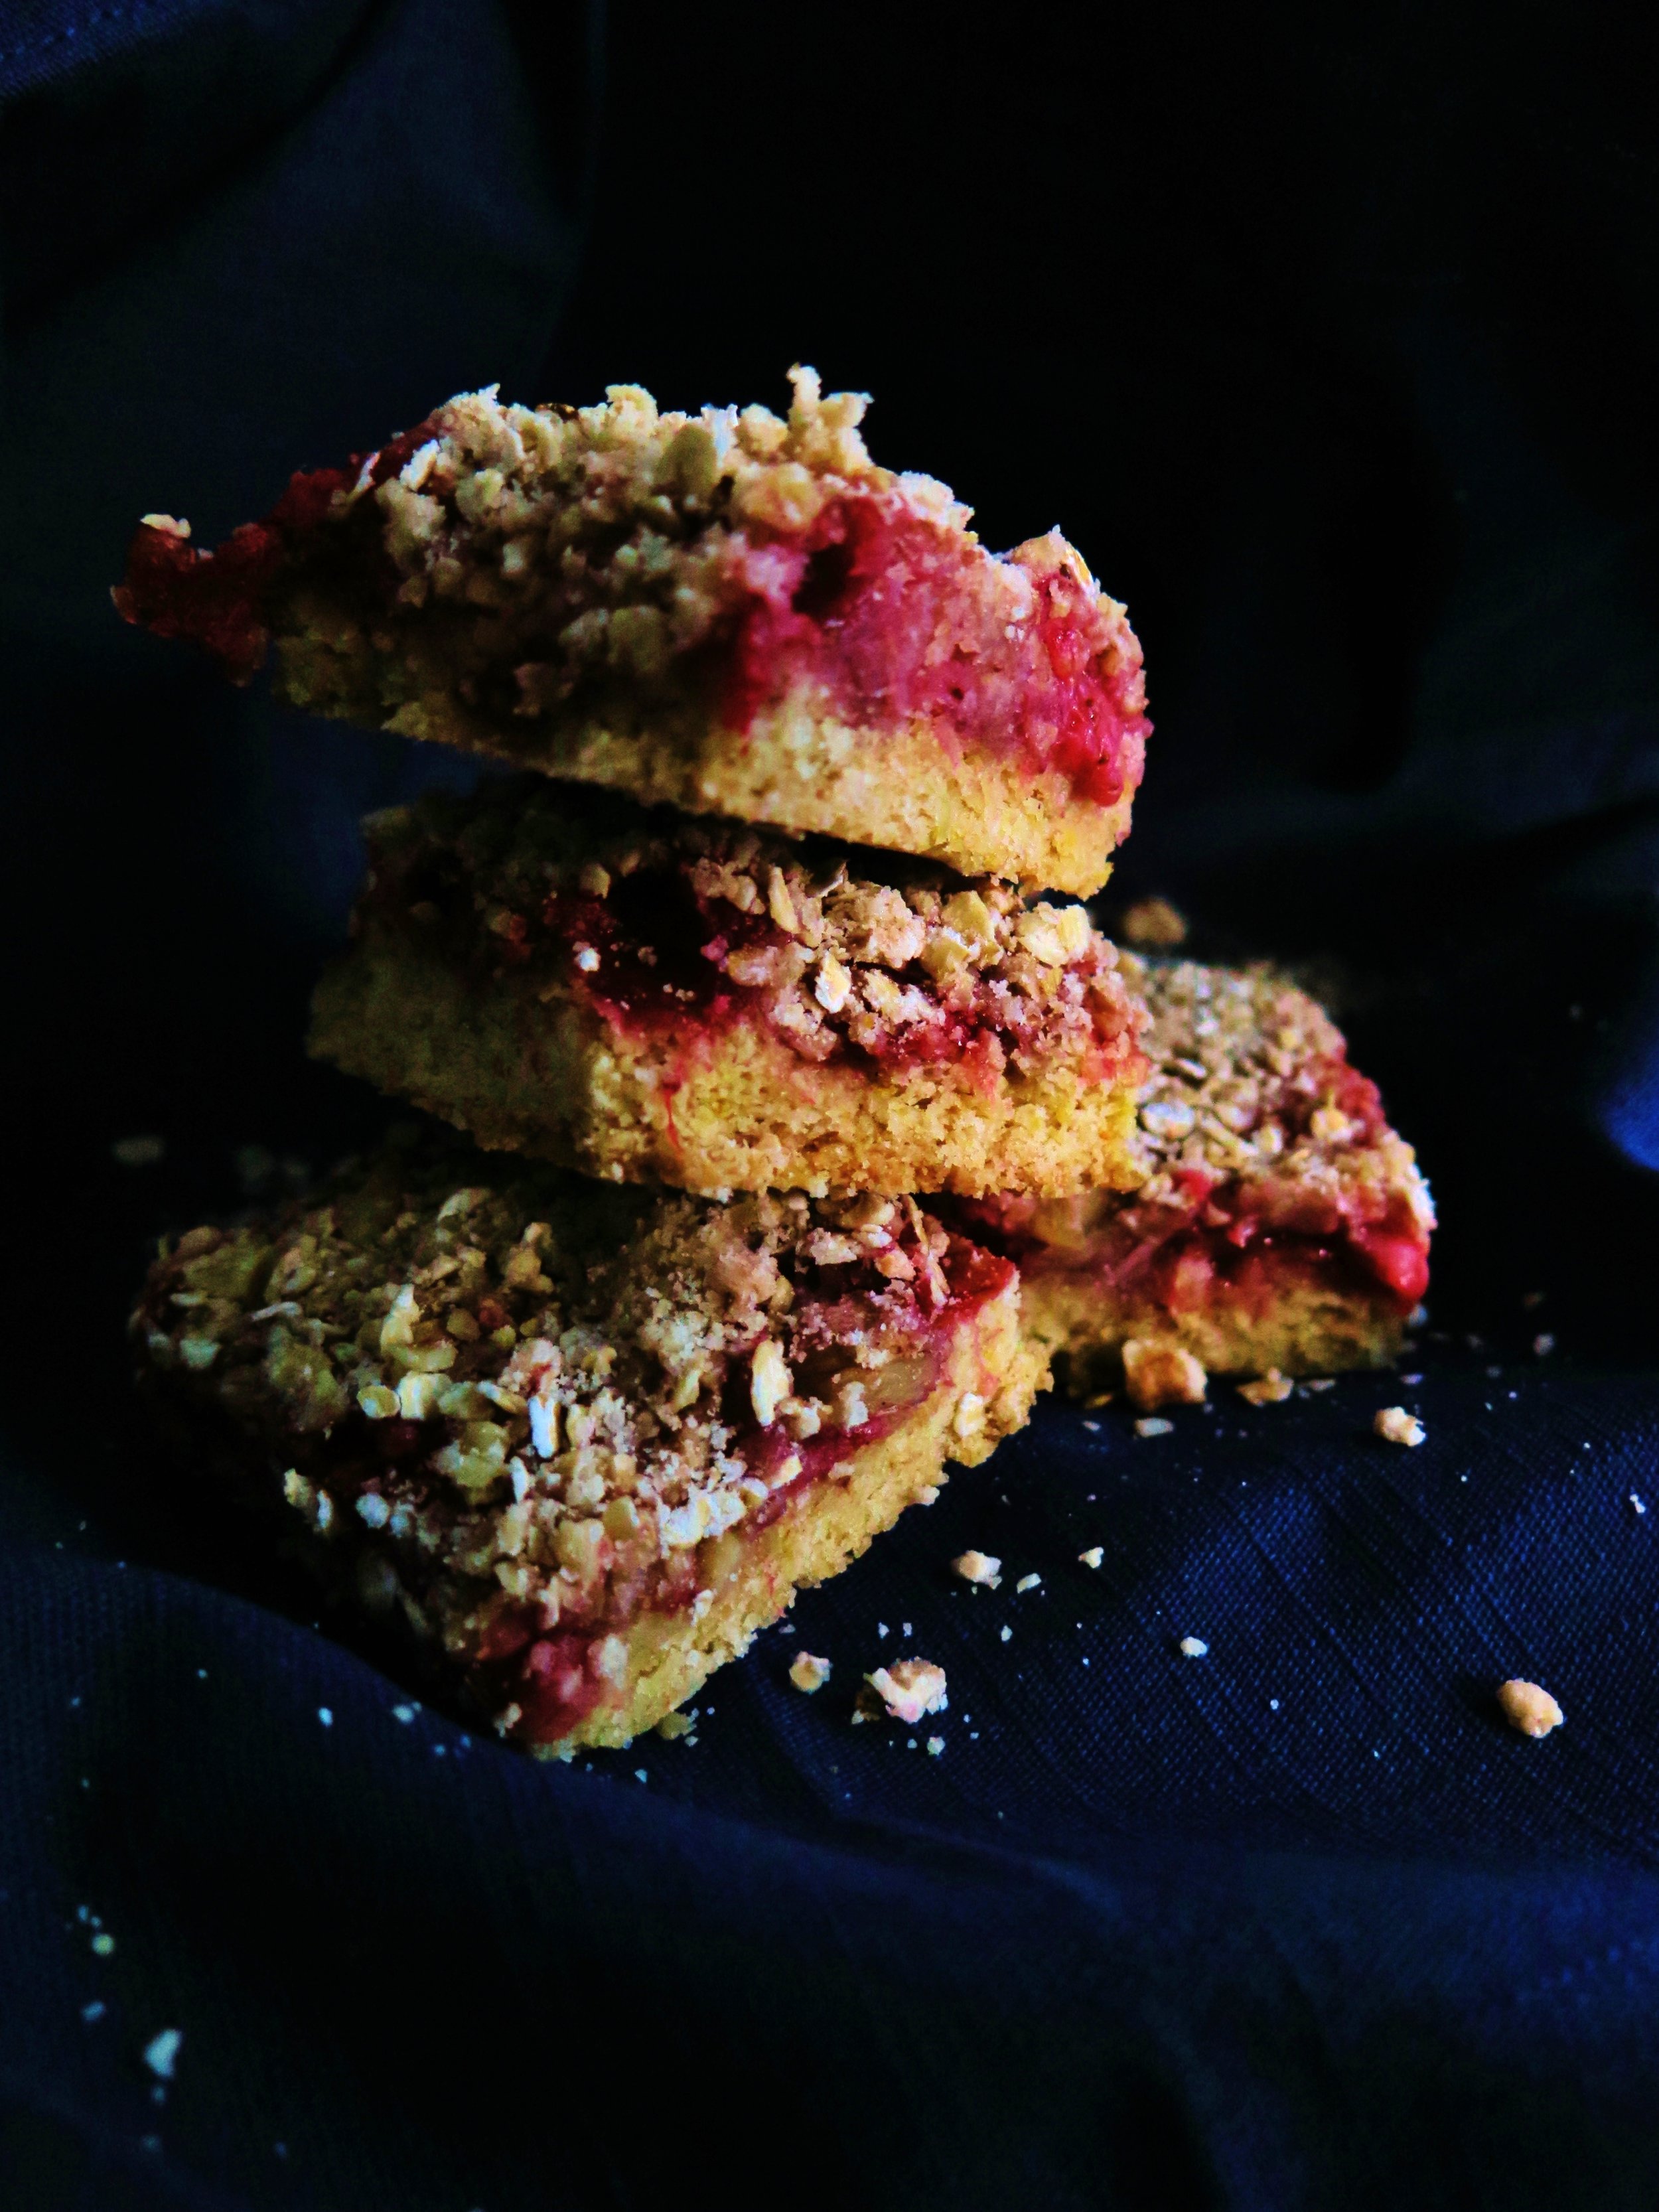
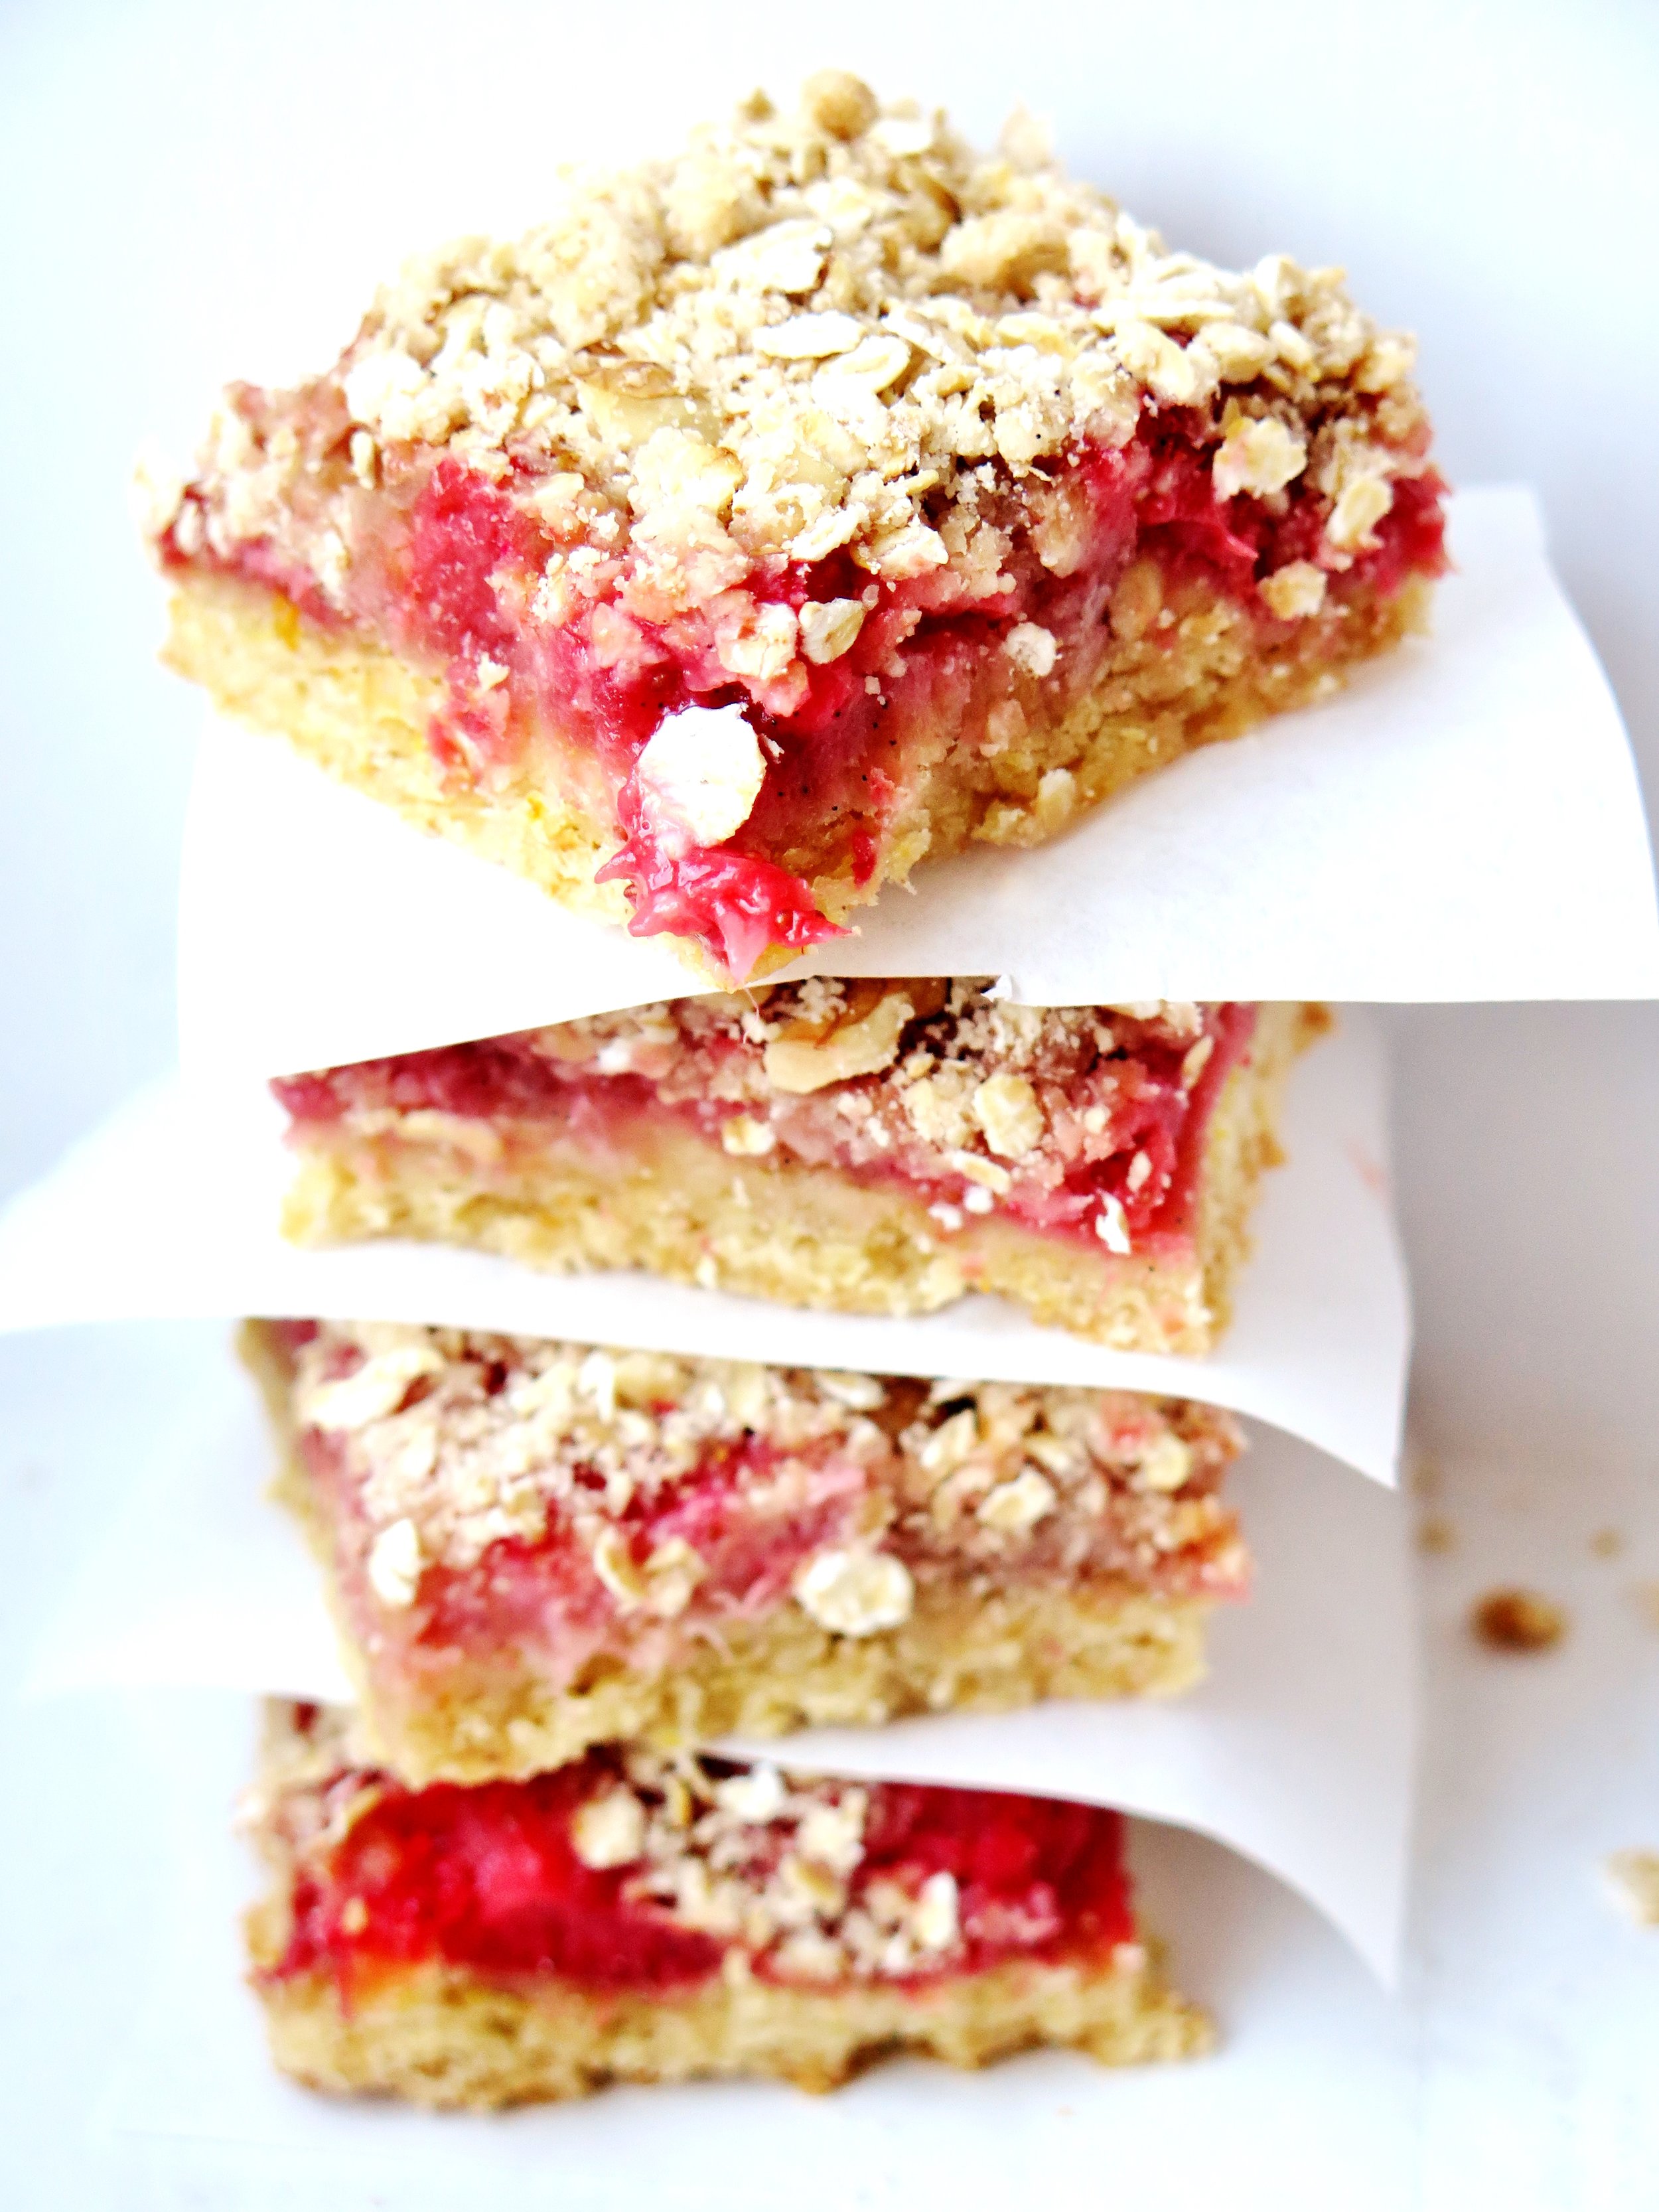
What’s your crumble-to-fruit ratio?  If you’re the kind who favours a preponderance of stewed fruit with an insubstantial fairy dusting of oaty-flour, turn away now.  If you lean towards the lavish when it comes to crumble proportion - good.  Read on…

Strawberry Crumble Bars

Strawberry Crumble Bars Strawberry Crumble Bars

I have experienced many a crumble: from damson to mulberry to cherry to apple, from autumn to winter to spring to summer. But regardless of the lusciousness of the interior, the crumbles that garner the most attention, that leave people scratching way at the remaining crumbs that have become forged to the side of the pan in yearning for more, are the ones with a superabundance of crumble topping.

Strawberry Crumble Bars

Crunchy, nutty, warming and eminently comforting – this is what a good crumble should be.  Enough so that you don’t worry about rationing the crumble in your bowl to suit the amount of fruit – enough so that every mouthful has a good proportion of both.

IMG_5024
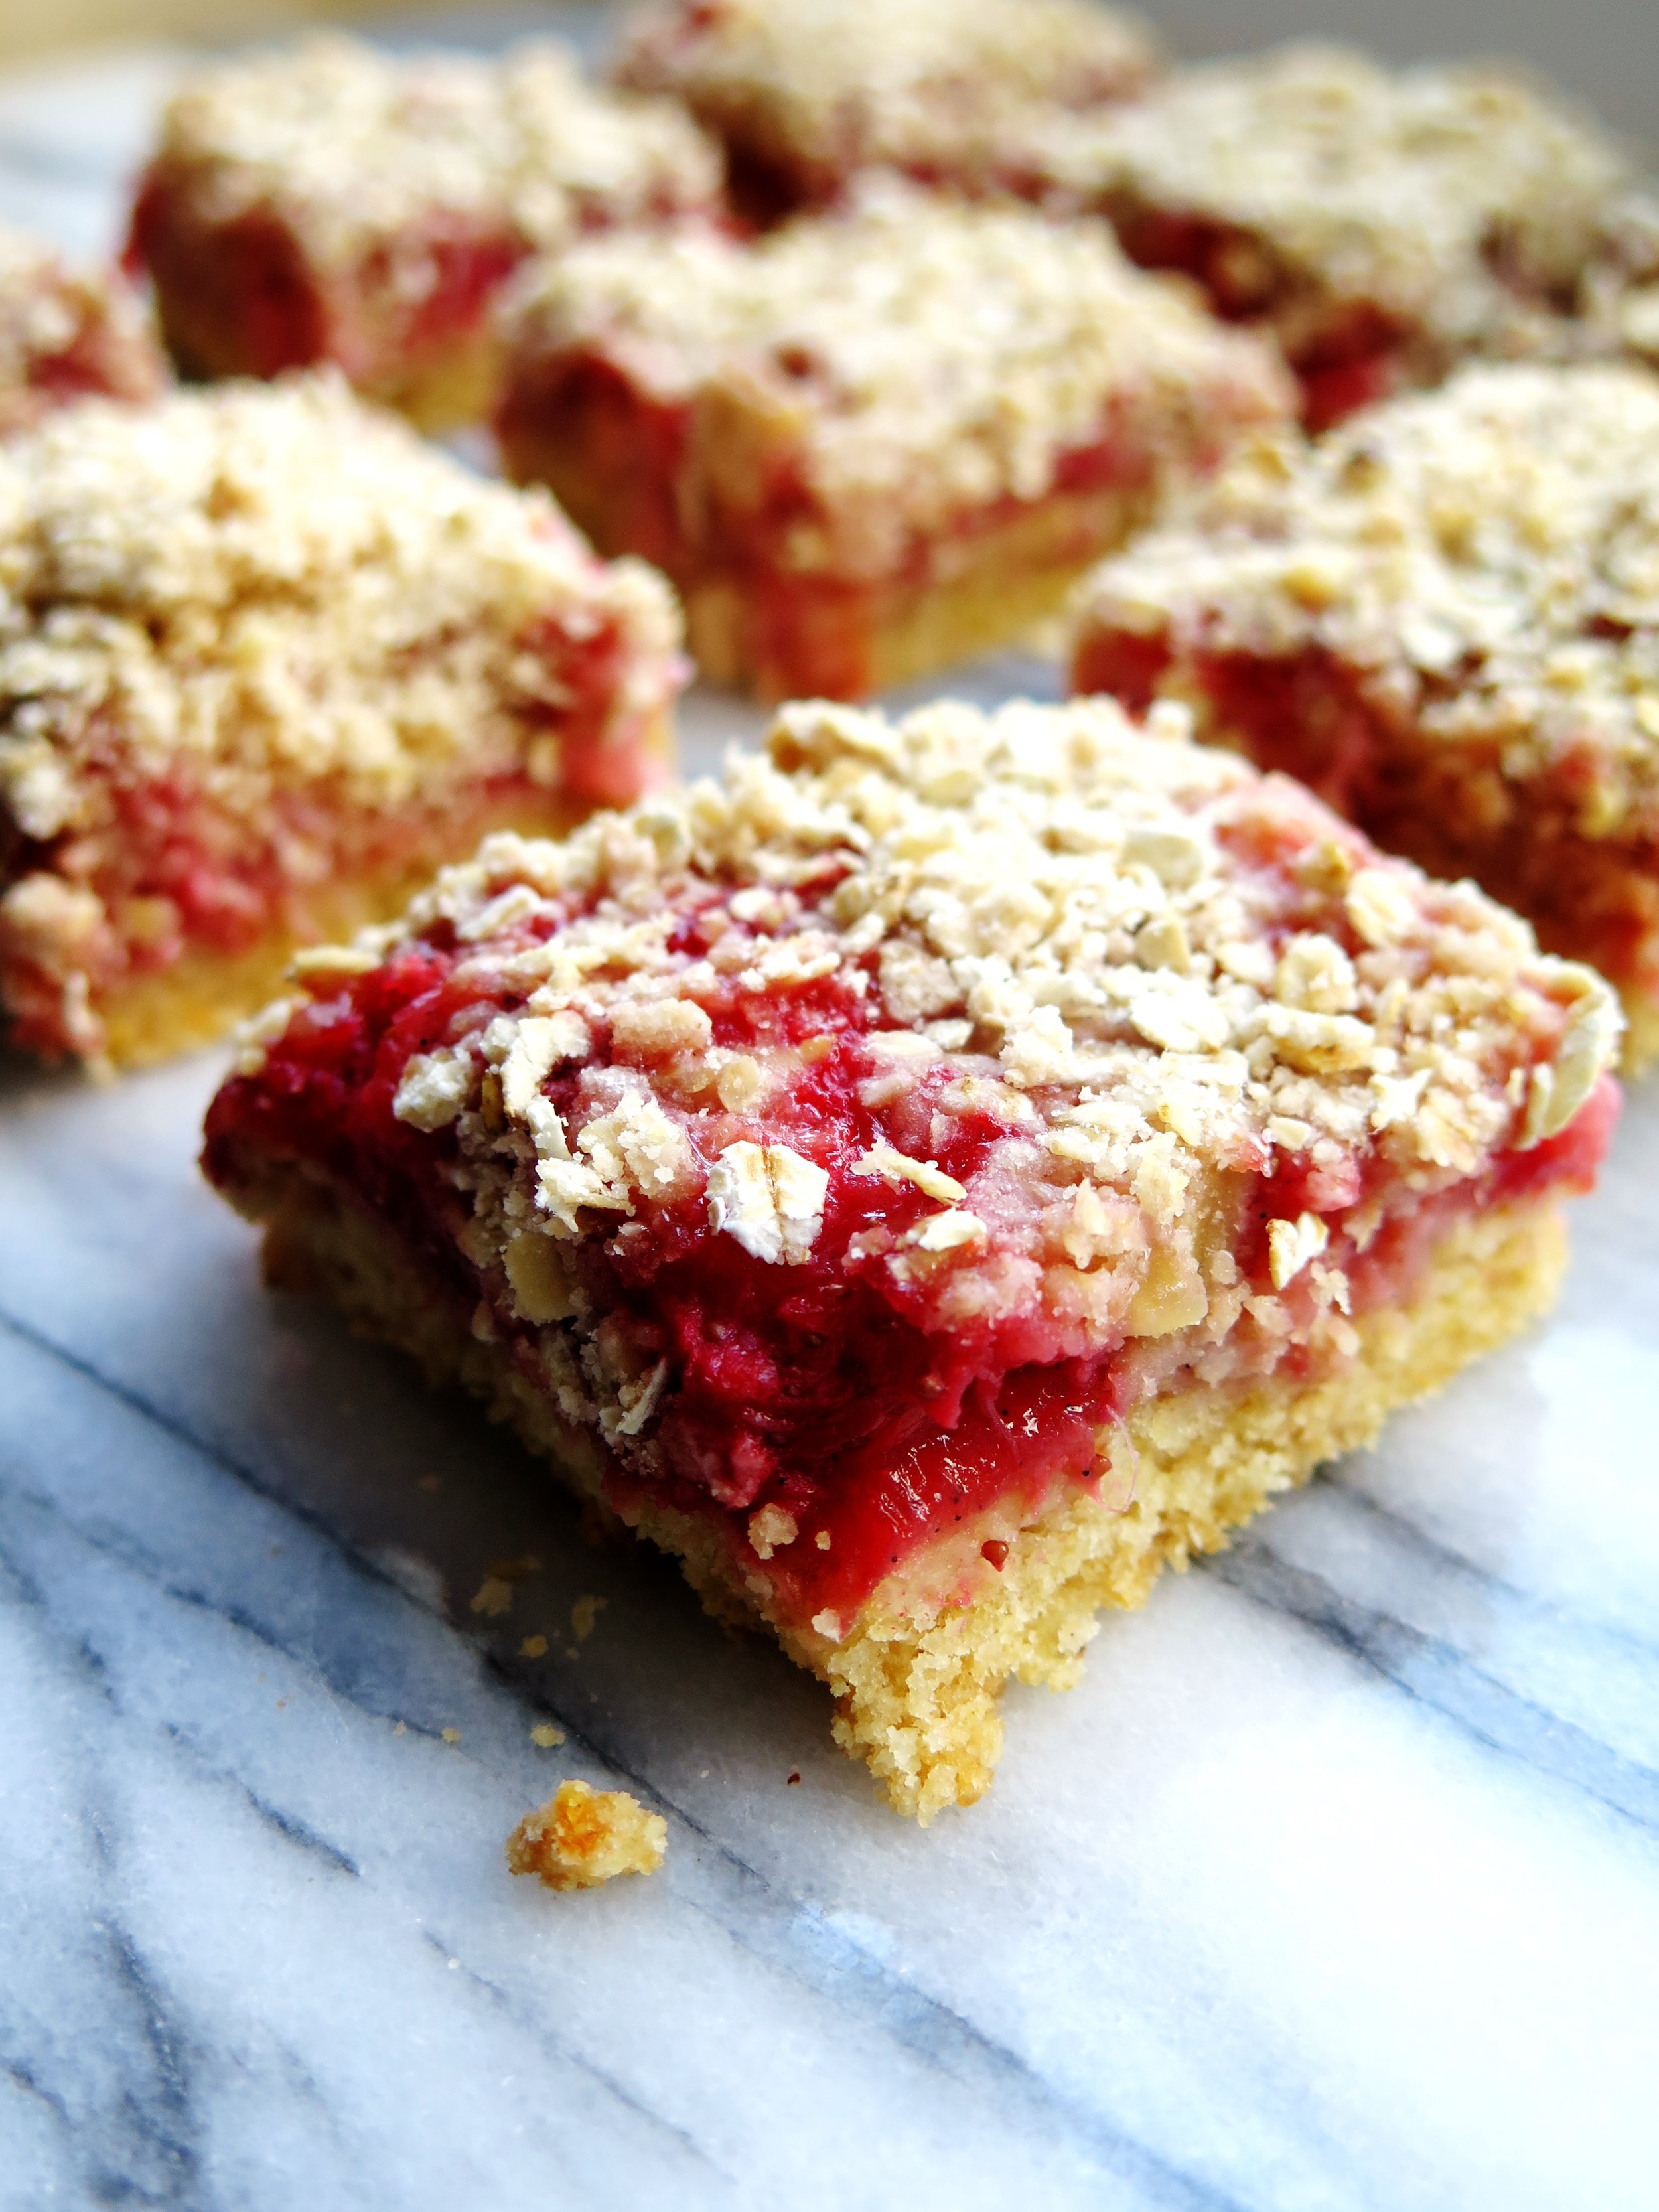
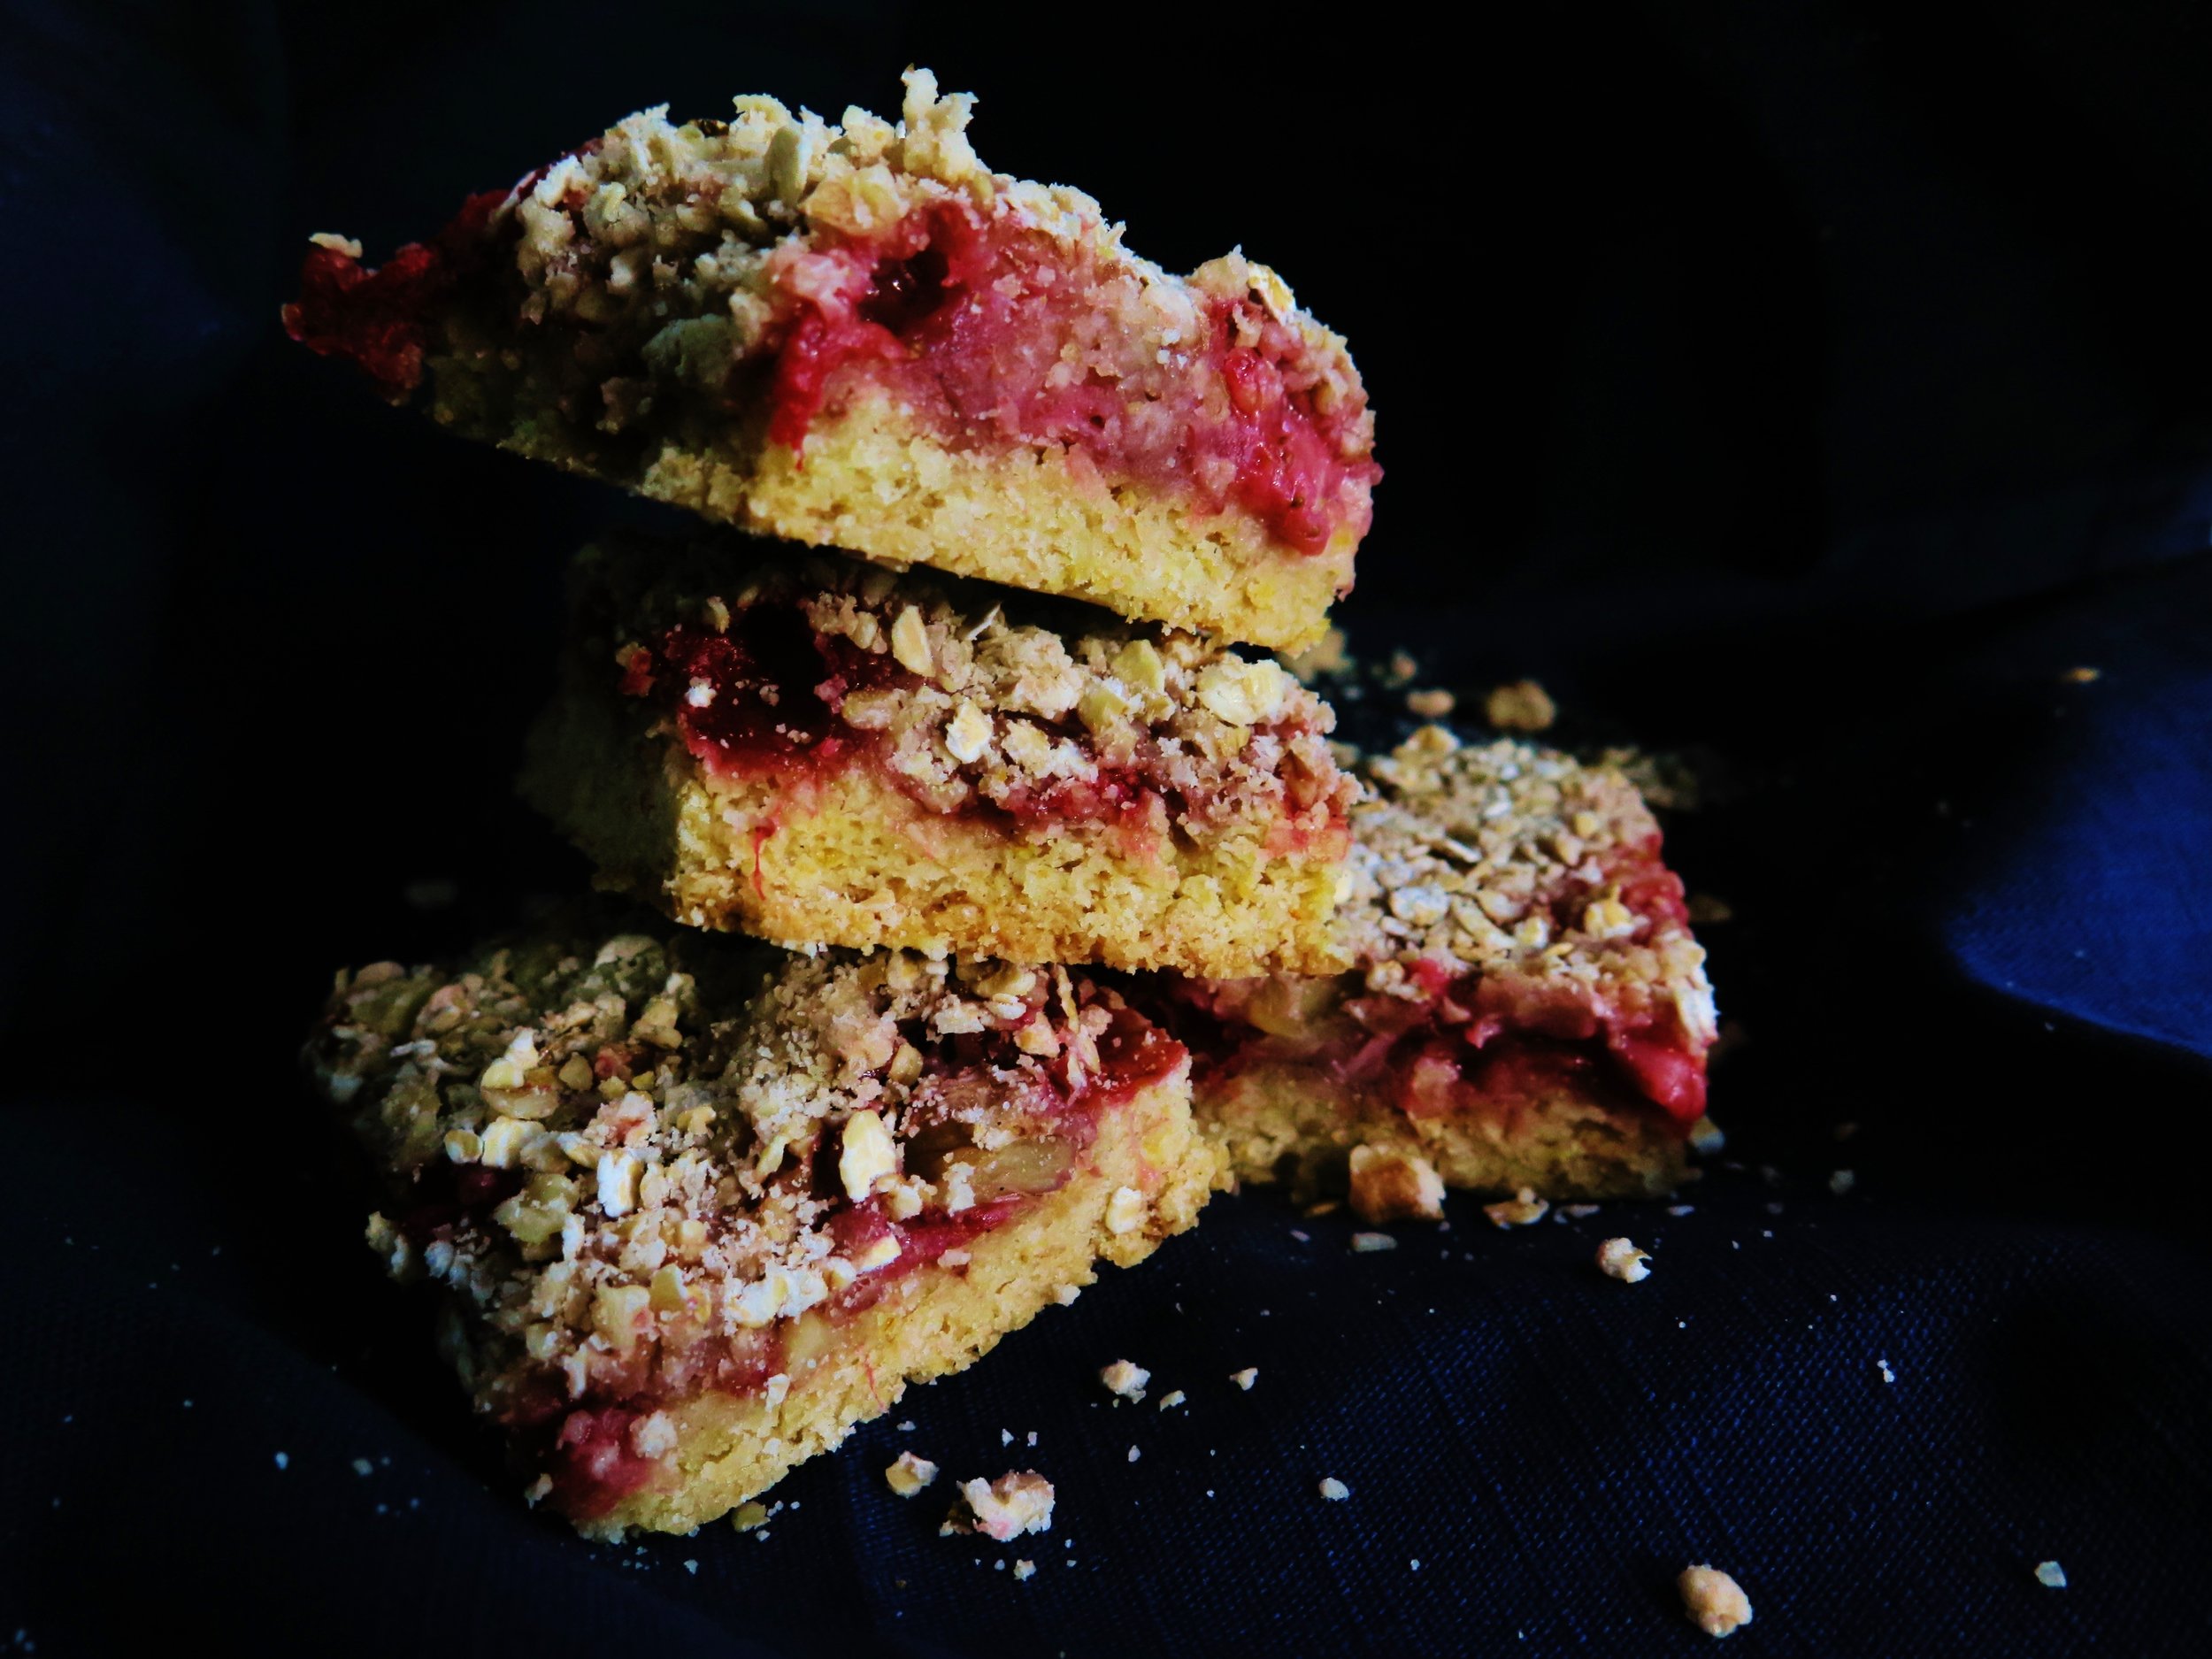
A good crumble, as with so many things, should leave you wanting more.

Strawberry Crumble Bars

But what if you don’t want to have to face the risk of eating the whole pot by mistake – or at least you if do want to be able to eat the whole lot, do so in a more measured way?

Strawberry Crumble Bars

What if you want to extend the experience beyond the comfort of your kitchen i.e. a portable crumble?

Strawberry Crumble Bars

Try these – fruity, nutty, fresh, and summery, with a subtle tang and not overly-sweet.  They are extremely quick and easy to make and, more importantly, the crumble–to-fruit ratio is verging on perfect…

Strawberry Crumble Bars


Ingredients

Base

115g sugar

½ tsp baking powder

210g white spelt flour (substitute any flour of your choice: plain, gluten-free or otherwise)

115g unsalted butter, roughly chopped

½ egg

¼ tsp salt

Finely grated zest of 1/2 orange

Juice of ½ orange

2 generous cups of strawberries, quartered

1 tbsp sugar

2 tbsp cornstarch

1 tsp vanilla bean paste (substitute with 1 tsp of vanilla bean extract if unavailable)


Crumble topping

20g unsalted butter

40g sugar

70g oats

30g finely chopped walnuts (remove if allergic)

50g white spelt flour (substitute with any flour of your choice, plain, gluten-free or otherwise)

Pinch of salt

20cm x 20cm tin lined with baking parchment (or a pan of similar area)


Method

  1. Preheat oven to 190˚C. Pour sugar, baking powder, flour, salt, and zest in a blender and pulse to combine.  Add butter and egg, and pulse until fully combined and has reached a slightly clumpy, damp sand consistency.  Pour this into the lined baking pan, and press down to create an even base layer.
  2. In a bowl, stir together chopped strawberries, orange juice, orange zest and cornstarch. Sprinkle evenly over the base layer (including the fruit juices.)
  3. Make the topping by pulsing together the butter, sugar, oats, flour and salt until fully combined and sand-like in texture. Stir in the walnuts, then sprinkle the mixture over the strawberries.
  4. Bake in oven for 30 – 40 minutes until the top is golden brown and the base is cooked through. Make sure to check after 20 minutes - you may need to cover the crumble with tin foil to prevent the top from catching (depending on your oven’s temperament). Once cooked, remove from the oven and slice into squares.  Eat immediately or later.

Strawberry Crumble Bars

Comment

The Best Bircher Muesli

2 Comments

The Best Bircher Muesli

'Oats: a grain, which in England is generally given to horses, but in Scotland supports the people’ Samuel Johnson, The Dictionary of the English Language, 1755

If I were the type of person that leafed (ironically) through Cosmo, and stumbled across one of those lazy, page-filling content, tree diagrams which happened to ask “what is your spirit animal?”, I know what mine would be. A horse.  Well, at least that’s what it would have been during the second year of my time at university in terms of comestibles…

Essay crises necessitate fuel in order to feed the adrenaline and, for me, that fuel came in the form of oats.

When you have a 9 am deadline approaching, and there is only one hour remaining, every minute is precious - so there is no time to spare for cooking oats over the hob until they break down into a creamy mulch.

The Best Bircher Muesli

That’s the excuse I gave myself.  Instead, I developed the rather grotesque habit of eating oats straight from the packet, raw and desiccated. In my maddened and pressured state, I savoured the clagginess of the oats, where you can’t quite conjure up enough saliva to swallow them.  Ideal.

I have since moved on from this stage (with the very occasional relapse) to a more acceptable way of dealing with my love of oats: Bircher muesli, invented by Bircher Benner, a pioneer of raw foodism, in the late 19th century as a way of curing his jaundice.  It worked.

I feel, somewhat justifiably, that it runs in my blood (thick & creamy): my great-great-uncle was a frequent patient at Benner’s rather avant garde  Swiss raw food clinic and, one sunny day, he stepped down from a plane on an impromptu visit from Scotland to South Africa with no clothes besides the ones on his back, a vegetable juicing contraption which he trailed behind him on a rickety little cart, and a proselytising passion for Bircher muesli.

The Best Bircher Muesli

I have tried many a Bircher muesli, from Swiss versions to Vietnamese attempts, but I feel I have concocted the ultimate version (excuse my arrogance).  Creamy, healthy, juicy, and exotic, it’s effectively manna, and I would happily have it for every meal of the day (jaundiced or not).

The Best Bircher Muesli  (Serves 5)

Ingredients

2 Braeburn apples, grated

Juice of 1/2 lemon

200ml orange juice

200g natural yogurt

200g almond and coconut milk (can be substituted with dairy or non-dairy alternatives)

3 tbsp maple syrup

1 tsp vanilla bean paste (if you can’t get hold of this, omit it, or substitute with ½ tsp vanilla extract)

50g desiccated coconut, lightly toasted in a pan on a low heat until pale gold)

200g porridge oats

Pinch of salt

200g of fresh fruit of your choice (blueberries, strawberries, raspberries, figs, sliced banana work well)

40g coconut chips (optional but adds great texture)

Method

  1. In a large bowl mix together all the ingredients apart from the fresh fruit and optional coconut chips. If you are making this the night before, cover the bowl with cling film and place in the fridge overnight to let the oats soak up the flavours.  If you are serving the muesli immediately, stir the mixture for a couple of minutes to break down the oats until they are creamy.
  2. If you are leaving the muesli overnight, allow it to come to room temperature before serving. Scatter mixed berries and fruits and coconut chips over the top and serve.

2 Comments

Tipsy Triple Raspberry Macarons

1 Comment

Tipsy Triple Raspberry Macarons

IMG_6464.jpg

Tipsy Triple Raspberry Macarons I refuse to believe that the macaron is simply a fad.  Admittedly, there was a craze which saw the opening of several French macaron boutiques in London. I shan’t name names but one of the largest French specialists does not even make them fresh in London. Instead, they import them frozen from France - in a state of hibernation, as they call it.

Tipsy Triple Raspberry Macarons

Tipsy Triple Raspberry Macarons

Despite this, the specialists remain, and the macaron is here to stay. Now that the craze has faded a little, I feel more free to write a recipe as people will be slightly less sick of the sight of the perfect ruffled shells.

Tipsy Triple Raspberry Macarons

Many are intimidated at the prospect of making them, but there really is no need.  The rumour of the challenge in making them may well have been promulgated by the macaron specialists themselves in order to justify their extortionate pricing.

Tipsy Triple Raspberry Macarons

To make them extra tangy and fruity, raspberry is worked into these macarons in three ways: freeze dried raspberries, raspberry jam and raspberry liqueur.  If you can’t get hold of freeze dried raspberries, just omit this element from the recipe.

Tipsy Triple Raspberry MacaronsTipsy Triple Raspberry Macarons

Tipsy Triple Raspberry Macarons

Triple Raspberry Liqueur Macarons 


Makes about 30 small macarons


Ingredients

110g icing sugar, sieved

50g ground almonds, blitzed in a blender to a fine powder, and sieved

5g freeze dried raspberry powder OR 10g freeze dried raspberries, crushed or whole (see below)

60g egg whites (about 2 eggs' worth)

40g caster sugar

A couple of drops of pink food dye (optional)

200g seedless raspberry am

4 tbsp Chambord (raspberry liqueur)


2 large baking trays lined with baking parchment – if you wish to achieve perfectly circular macarons, create guidelines for the piping by drawing in pencil round a 4cm bottle lid repeatedly on the greaseproof paper, leaving at least 4cm between each circle.  Flip it over after doing this to ensure that the pencil does not transfer to the macaron


Piping bag fitted with 0.5cm nozzle


  1. In a large bowl, mix together the sieved icing sugar, ground almonds and freeze dried raspberry powder.  If you can only get hold of crushed or whole freeze dried raspberries, place these in a blender and blitz until they are as pulverised as possible, and then sieve to remove the seeds.  You should be left with a fine red dust.
  2. Pour egg whites into the bowl of a bone dry electric mixer fitted with a whisk attachment. Whisk at a high speed until soft, foamy peaks form.  Then, with the whisk still ongoing, add in the caster sugar, a tablespoonful at a time.  Keep whisking until the meringue is glossy and firm peaks form.
  3. Take a third of the meringue and mix it into the dry ingredients.  If the dry ingredients don’t fully combine, stir in another tablespoon of meringue.  At this point you can add a couple of drops of food dye to reach desired colour - anything from baby  girl to schiaparelli pink. The mixture should turn into a thick, smooth paste.  Then, gradually fold in the rest of the meringue, a tablespoon at a time, until the mixture becomes glossy and smooth.
  4. Spoon mixture in the piping bag and pipe little dots directly onto the corners of the baking tray to stick the baking parchment down.  Then pipe the mixture into each circle.  Once finished piping, tap the tray down firmly on a hard surface a couple of times to remove the air bubbles from the macarons. Then set the macarons aside at room temperature for 30 minutes.  This will allow a skin to form and will lead to the creation of the often-elusive but essential “macaron foot”.
  5. While they are resting, preheat oven to 150˚C. Bake the macarons for 20 minutes or until they can be lifted off the tray cleanly with a pallet knife. Allow them to cool until they reach room temperature.
  6. Place raspberrry jam in a small pot over a medium-high heat and stir continuously. After it has bubbled furiously for a couple of minutes, stir in the Chambord.  Allow the mixture to simmer for about 5 minutes,  or until it has become more viscous and thick enough to be able to be dropped off a spoon. Remove from the stove, allow to cool for 5 minutes and then sandwich each pair of macaron shells together with a teaspoon of the mixture.

Tipsy Triple Raspberry Macarons


Tipsy Triple Raspberry Macarons

1 Comment

Cherry & Yuzu Frozen Yoghurt Almond Cookie Sandwich

10 Comments

Cherry & Yuzu Frozen Yoghurt Almond Cookie Sandwich

IMG_6945.jpg

(Affectionately known as Froyo Yoyos) Cherry & Yuzu Frozen Yoghurt Almond Cookie Sandwich

If something becomes a fad, I usually try to avoid it.  Cupcakes were once things of joy, their light, sweet, spongeyness perfuming the house with the scent of birthdays.  And there was always the hope of left over icing, not to mention the ease with which one could convince oneself that the perfectly domed surface was in need of decapitation, just to preview the crunchy golden coated delicate sponge, just in case the cupcakes weren’t guest-worthy.  But now those simple pleasures have been crushed for me as the once-a -year treat has lost its golden hued novelty.

Cherry & Yuzu Frozen Yoghurt Almond Cookie Sandwich

The single-concept shops dedicated to cupcakes are now a graveyard for the dying fad.  I walked past a well-known purveyor of cupcakes in the middle of an airless department store only last week, and watched as the woman behind the counter shuffled the gaudy treats into reverse rainbow order in an attempt to look busy.

Cherry & Yuzu Frozen Yoghurt Almond Cookie Sandwich

Frozen yoghurt is no longer a novelty, but for me at least it has not yet lost its appeal.  Some people (including me) are able to delude themselves that even with the marshmallow, cookie dough, caramel topping it’s a healthier version of their favourite ice cream.

Cherry & Yuzu Frozen Yoghurt Almond Cookie Sandwich

When the clouds deigned to expose a sliver of sunlight for a short while on Saturday, I decided to indulge in a little frozen yoghurt.

Cherry & Yuzu Frozen Yoghurt Almond Cookie Sandwich


Cherry & Yuzu Frozen Yoghurt Almond Cookie Sandwich

The cherries at my favourite fruit monger were so glossy and irresistibly crimson they were begging to be involved in my hoping-for-summer recipe.  I combined them with yuzu juice for a touch of astringency to cut through the sweet creaminess of the yoghurt. Then, to add a childlike allure, I sandwiched the frozen yoghurt between two discs of biscuit which I’d infused with almond extract to bring out the cherry flavour further.

Cherry & Yuzu Frozen Yoghurt Almond Cookie Sandwich

The yuzu juice provides a wonderfully tart citrusy note to the frozen yoghurt.  If you can't find it, substitute it with lemon or lime.

Cherry & Yuzu Frozen Yoghurt Almond Cookie Sandwich

I used an ice cream churner to make the frozen yoghurt smoother and the ice crystals finer, but if you don’t have one this stage can be skipped and the result will still be delicious.

Cherry & Yuzu Frozen Yoghurt Almond Cookie Sandwich

Of course, the cherry and yuzu frozen yoghurt can be enjoyed sans biscuit.  The biscuit is however, rather useful if you wish to turn it into a hand held treat, whether or not the sunshine lingers.

Cherry & Yuzu Frozen Yoghurt Almond Cookie Sandwich

Cherry & Yuzu Frozen Yoghurt Almond Cookie Sandwich


Ingredients  (makes 8-10)

Cherry and Yuzu Frozen Yoghurt

375g cherries, halved and pitted

125g caster sugar

250g full fat natural yoghurt (don’t use Greek)

1 tsp yuzu juice

6 drops of almond extract

1 medium sized (18cm x 28cm approx.) loaf tin, lined with cling film


Almond Biscuit

160g butter, at room temperature

2 egg yolks

10 drops almond extract

210g plain flour

50g sugar

1tsp vanilla extract

¼ tsp salt

1 large baking tray lined with baking parchment

4.5/5cm circular cookie cutter or wine glass


Method

Cherry & Yuzu Frozen Yoghurt

  1. Place cherries and sugar in a small pan over a high heat. Stir occasionally to prevent sugar from burning.  When enough liquid has run out from the cherries to coat the base of the pan and it begins to boil, reduce heat to medium.  Allow to simmer for 10 minutes until the liquid from the cherries has reduced and is just slightly thicker than maple syrup.
  2. Allow the cherries and syrup to cool then blitz them together with the yuzu, almond extract and yoghurt until smooth. If you are using an ice cream maker, chill the mixture and then churn according to the manufacturer’s instructions.  Otherwise, proceed to step 3.
  3. Pour the mixture into the cling film-lined loaf tin, and smooth the surface with a spatula. Place in freezer for 1-2 hours until solid.

Almond Cookies

  1. Beat the butter in a mixer (or by hand) until light and fluffy. Into this, beat the almond extract, vanilla extract and egg yolks.
  2. In a separate bowl, mix together flour, sugar and salt. Stir this into the butter mixture until a dough forms.
  3. Flatten the dough into a disk, wrap in baking parchment and place in freezer for 15 minutes (or fridge for 30 minutes).
  4. Preheat oven to 160˚C.
  5. On a floured surface, roll out the dough to 7mm thickness. Using the cookie cutter, cut the dough into the discs and place on lined tray.
  6. Bake for 7-10 minutes until cooked all the way through but still pale. Allow to cool.

Assembly

Remove the loaf tin containing the frozen yoghurt from the freezer. Using the cookie cutter, cut the frozen yoghurt into discs and sandwich each disc between two almond biscuits.  Store these in an airtight container and return to the freezer until ready to serve.

Cherry & Yuzu Frozen Yoghurt Almond Cookie Sandwich

10 Comments

Stripy Lemon & Raspberry Cake - Recipe

21 Comments

Stripy Lemon & Raspberry Cake - Recipe

IMG_5587.jpg

Stripy Lemon & Raspberry Cake This stripy lemon and raspberry cake speaks for itself: elegant and refined on the outside, yet quirky on the inside - great if you feel like a change from the usual, and you’re in the mood for something fun.

Stripy Lemon & Raspberry Cake


Stripy Lemon & Raspberry Cake

Unlike most layer cakes, the stripes are vertical.  This makes it both superficially pleasing and more delicious - more stripes = more sumptuous raspberry compote...

Stripy Lemon & Raspberry Cake


Please don’t be intimidated by the lists of ingredients and the recipe.  It really is a lot easier  and quicker than you may think: the stripes are formed by baking the sponge in a baking sheet, spreading the cooked surface with the raspberry compote, cutting it into strips, and rolling them, one strip after the other, swiss roll-like, into a ‘log’.

Stripy Lemon & Raspberry Cake

The sponge is light and lemony, the raspberry compote is tart and moreish, and the icing is infused with berries to provide a little summery freshness.

Stripy Lemon & Raspberry CakeStripy Lemon & Raspberry CakeStripy Lemon & Raspberry CakeStripy Lemon & Raspberry CakeStripy Lemon & Raspberry CakeStripy Lemon & Raspberry CakeStripy Lemon & Raspberry CakeStripy Lemon & Raspberry Cake

Ingredients

Cake

120g plain flour

1 tsp baking powder

¼ tsp salt

3 large eggs

140g caster sugar

Zest of 1 lemon

½ tbsp. water


Baking sheet 38x25x2.5 cm, lined with baking parchment and covering both the base and shallow sides.

Additional baking parchment


Raspberry compote

200g raspberries fresh or frozen, but if using frozen, defrost before use

40g caster sugar

2 tsp vanilla extract

2 tbsp water

150g raspberry jam

2 tbsp corn flour

½ tsp lemon juice


Crumb coating (optional – but makes icing easier and adds extra tanginess and interest to the cake)

75g icing sugar, sieved

50g butter at room temperature

2 tsp lemon juice


Berry-infused cream cheese icing

25g red berries (raspberries and redcurrants work well, and you can use frozen), blitzed until smooth to make a puree

½ tsp lemon juice

75 g cream cheese, at room temperature (essential)

50g unsalted butter, softened to the point that it is threatening to turn into liquid

300g icing sugar, sieved


Method

Raspberry compote

  1. Place frozen/fresh raspberries, sugar, vanilla extract, and water in a saucepan over high heat and stir until the sugar has dissolved. Simmer for 5 minutes or until the texture is slightly syrupy.
  2. Stir in the raspberry jam and corn flour, and boil for a further 2 minutes. Remove from heat.
  3. Blitz the mixture together with the lemon juice in a blender until smooth.

Lemon Sponge Cake

Stripy Lemon & Raspberry Cake

  1. Preheat oven to 220˚C.
  2. Beat together eggs and sugar for about 5 minutes until pale and custard-like (I find it easier to use an electric mixer).
  3. Fold into the wet mixture the sifted flour and baking powder, lemon zest, salt and water. Stir as little as possible and with a light hand so as to keep the mixture airy.
  4. Pour the mixture into the lined baking sheet and spread it out in an even layer right up to the edges of the tray. Place in the centre of the oven, and bake for 4-5 minutes until golden brown and a skewer comes out clean.
  5. While the cake is still warm from the oven, flip it upside down on to a large sheet of baking parchment. Carefully peel off the parchment layer on which it was baked.
  6. Spread the compote evenly over the lemon sponge, and slice lengthways (i.e. from short side to short side) into 4 equal strips of cake.
  7. Begin with one strip and roll into a coil. Place the edge of the roll next to the edge of the second strip and continue to roll.  Continue with the remaining strips until a large spiral is formed.  Place the ‘log’ spiral side up on a plate or cake stand.

Lemon crumb coating (optional, but makes icing the cake easier, and adds extra tanginess and interest)

  1. Beat together icing sugar, lemon and butter until creamy and spread in a thin layer over the top and sides of the cake. Place in the fridge for half an hour, or the freezer for 10 minutes.

Berry-infused cream cheese icing

  1. Beat the butter until completely smooth, then beat in the cream cheese. Stir in the berry puree and lemon juice, before beating in the icing sugar.
  2. Spread evenly over the cake using a spatula. Decorate with berries, or as desired.


Stripy Lemon & Raspberry Cake


21 Comments

Seeded Spelt Crackers - Recipe

9 Comments

Seeded Spelt Crackers - Recipe

IMG_5199.jpg

Last week I panic baked.  My usually dependable supply of Dr Karg’s seeded spelt and emmental and pumpkin seed crisp breads had run dry. Only a few sad seeds in the corner of the packet remained, which I ate mournfully, before desperation led me to pulling open drawers in search of the emergency packet I had hidden from myself.

IMG_5211
IMG_5211
Seeded Spelt Crackers - Recipe

My hunt was rewarded with absolutely no trophies.  I must have found them some time before.

Seeded Spelt Crackers - Recipe

Necessity mothered invention: I combined some of my favourite ingredients to make my own version of the crisp breads, and they turned out rather well, perhaps even better than the originals. My family had clearly also been struck by panic, as two batches were devoured in ten minutes…

Seeded Spelt Crackers - Recipe

These crisp breads are ridiculously quick to make, healthy (when you don’t eat the whole batch in one sitting – an almost impossible feat), and delicious.  They’re also versatile – the seeds can be eliminated and/or exchanged for other varieties as desired, and they can be served with hummus, red pepper pesto (see my recipe), guacamole etc.  They can also be made dairy-free by eliminating the cheese.

Seeded Spelt Crackers - Recipe

Ingredients

115g white spelt flour

100g wholemeal spelt flour

¾ tsp salt

30g sesame seeds

15g poppy seeds

30g pumpkin seeds

50g cheddar, grated

50g parmesan grated, + 5g for sprinkling

1 tsp cayenne pepper (optional)

125ml water

1 tbsp olive oil

1 baking tray, overturned, greased with oil and dusted with flour

Method

  1. Preheat oven to 220˚C. In a large bowl mix dry ingredients together. Pour in water and oil and stir until mixture clumps together into quite a dry dough.  You may need to knead it slightly with your hands.
  2. Place dough on overturned baking tray and roll it out until it reaches the edges of the tray. It should be about 3mm thick.
  3. Sprinkle with the extra parmesan, prick the dough liberally with a fork, and score it into your preferred geometric shapes. I like 4cm x 10cm rectangles.
  4. Place in oven and bake for 10-15 minutes until golden, and firm to touch. Leave to cool – they will become crisper as they cool.
Seeded Spelt Crackers - Recipe

9 Comments

Top 5 Cakes in London - Gail's Artisan Bakery (3)

Comment

Top 5 Cakes in London - Gail's Artisan Bakery (3)

IMG_8677.jpg

Gail's Artisan Bakery - Top 5 Cakes in London There are a number of Gail’s bakeries now in London, but this should most definitely not put you off.  The interiors are clean in feel with a robust modern rustic ambience. Unfussy, good quality British baking with a wholesome feel, my spirits lift when I see there is a branch nearby.

Gail's Artisan Bakery - Top 5 Cakes in London

There are maple brioche buns, cinnamon swirls and muffins,

Gail's Artisan Bakery - Top 5 Cakes in London

sour cherry and chocolate drop scones and lemon drizzle cake, miniature pistachio chocolate cakes,

Gail's Artisan Bakery - Top 5 Cakes in London

pecan pies,

Gail's Artisan Bakery - Top 5 Cakes in London

white chocolate cheesecake,

Gail's Artisan Bakery - Top 5 Cakes in London

brownies,

Gail's Artisan Bakery - Top 5 Cakes in London

cookies,

Gail's Artisan Bakery - Top 5 Cakes in London

and, of course, there is carrot cake.

Gail's Artisan Bakery - Top 5 Cakes in London

The latter is sublime – I can’t describe the disappointment I feel when the last crumb has been chased into oblivion - and the delight that the apple crumble cake instils has already been documented...

Gail's Artisan Bakery - Top 5 Cakes in London

Gail's Artisan Bakery - Top 5 Cakes in London

Style of cakes: Modern British

Price: ££££

Location: Barnes, Battersea, Belsize Park, Bloomsbury, Chiswick, Crouch End, Dulwich Village, Exmouth Market, Fulham Road, Hampstead, King's Road, Notting Hill, Queen's Park, Seymour Place, Soho, South Kensington, St John's Wood

Suitable for: casual dates, brunch, lunch, afternoon tea, dessert, takeaway, snacks

Comment

Snowflake

Comment

Snowflake

IMG_8230.jpg

Snowflake Luxury Gelato, London - Review From paneer to pad thai to hummus to tapas to cannoli to burgers  to burritos to sushi  to pizza to goujons to hot dogs to steak frites, to apple pie… If streets had BMIs, Wardour St would be severely in the red zone, but in a good way.  What more could possibly be thrown into Wardour Street’s near boiling-over pot of restaurants?  Something to cool it down, as it happens:  and that is Snowflake Gelato, the ice cream boutique at number 102.

Snowflake Luxury Gelato, London - Review

I had cast an admiring glance over the chic, clean-lined interior of Snowflake last Saturday night.  I’m not one to follow the crowd mindlessly, but a queue was pouring out of the shop despite the fact that it was freezing outside, and I etched it on to my never-ending mental list of places to try.  So when Asad, the owner of Snowflake, kindly invited me to sample the extensive selection (52 flavours) of gelati that he, and his Neapolitan chef, had dreamt up, I leapt at the chance.

Snowflake Luxury Gelato, London - Review

Obviously,  deploying the ‘moderation in moderation’ mantra, the sampling turned into a full-on degustation.  My favourite restaurant in Italy makes its own delicious gelato daily using only local ingredients, so when it comes to ice cream, standards have been set.  Luckily, Snowflake did not disappoint.

Snowflake Luxury Gelato, London - Review

Snowflake Luxury Gelato, London - Review

Snowflake Luxury Gelato, London - Review

With its Italian chef, waiters , and ingredients, it has succeeded in importing some of the essential aspects of Italy to Wardour Street, apart from the sun.

Snowflake Luxury Gelato, London - Review

Of the many flavours that I sampled, the raspberry sorbet,  the coconut ice cream, the honeycomb ice cream, and the hazelnut were the stand outs – all so smooth that I plan to camp out there in a couple of weeks post- wisdom tooth removal…

Snowflake Luxury Gelato, London - Review


Food: 9/10

Price: ££££

Ambience: 8/10

Service: 10/10

Loos: N/A

Suitable for: casual dates, friends, night out, late night dining

Square Meal

Snowflake Gelato on Urbanspoon

Comment

Carb-free, Sugar-free, Gluten-free Fruit & Seed Bars

7 Comments

Carb-free, Sugar-free, Gluten-free Fruit & Seed Bars

gluten-free.png

Carb-free, Sugar-free, Gluten-free  Fruit & Seed Bars When you get the 4 o’clock slump, moderation is at an all-time low and chocolate bars are winking at you, reach for one of these carb-free, sugar-free, gluten-free fruit & seed bars instead.  They are high in protein, vitamin rich, low GI, ridiculously easy to make (no baking), yet despite their virtuousness, they are irresistibly delicious.

Carb-free, Sugar-free, Gluten-free  Fruit & Seed Bars

Carb-free, Sugar-free, Gluten-free  Fruit & Seed Bars

Carb-free, Sugar-free, Gluten-free  Fruit & Seed Bars


Ingredients

500g mixed seeds (I use pumpkin, sunflower, sesame)

40g ground almonds (optional)

3 tbsp chia seeds (optional)

3 tsp vanilla bean paste (use vanilla extract if not available)

200g medjool dates

200g dried figs

Pinch of salt

20x25cm baking tray, greased


Makes about 30, depending on size

Method

  1. Pre-heat the oven to 180˚C.
  2. Spread out the mixed seeds on a large baking tray (not the pre-greased one) and place in centre of oven to toast for 5 minutes until they are beginning to turn golden. To achieve the same result without an oven, toast them in frying pan over a medium heat and stir continuously for about 5 minutes.
  3. Blend together figs, dates, vanilla bean paste and salt until they turn to a smooth paste.
  4. In a large bowl mix together toasted mixed seeds, ground almonds, chia seeds and the fig-date paste until thoroughly combined.
  5. Press the mixture into the pre-greased baking tray and slice into bars of desired size.
  6. Wrap the tray with clingfilm and place in freezer for at least an hour, or leave overnight in fridge to set. The bars will last for several weeks.

7 Comments